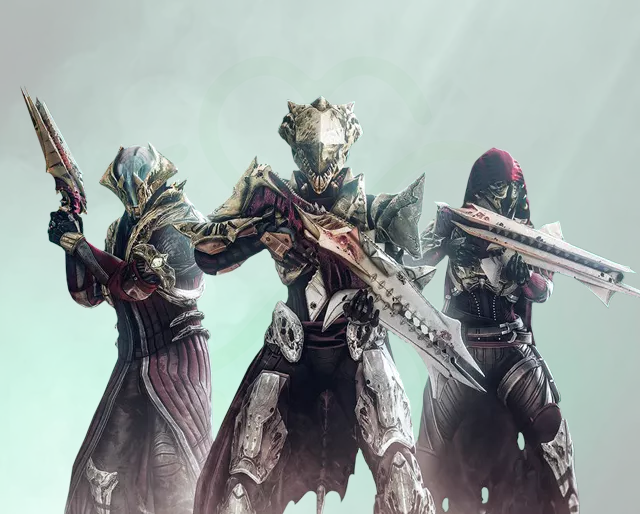
The Throne of Thunder raid in World of Warcraft is a massive, multi-winged instance on the Isle of Thunder, reflecting the power of Lei Shen, the Thunder King. Released with Patch 5.2 of the Mists of Pandaria expansion on March 5, 2013, it introduced new content for both the Horde and the Alliance, available in LFR, Normal, Heroic, and Mythic modes.
Key Highlights:
Location: Isle of Thunder, off the coast of Pandaria.
Main Antagonist: Lei Shen, the Thunder King.
Release Date: March 5, 2013, with Patch 5.2.
Difficulty Modes: LFR, Normal, Heroic, Mythic.
The raid explores the history of Lei Shen, who harnessed storm powers to dominate Pandaria. Players face various enemies, including mogu, saurok, and Zandalari trolls, with each boss presenting unique challenges.
You can make your first purchase even CHEAPER! Feel free to use a special BLOG20 promo code to get a 20% DISCOUNT!
Throne Of Thunder Bosses
The Throne of Thunder raid in World of Warcraft, introduced in the Mists of Pandaria expansion, is a massive instance located on the Isle of Thunder in Pandaria. It features multiple challenging boss encounters, each with unique mechanics.
Key Bosses and Highlights:
Jin’rokh the Breaker: Uses lightning-based attacks requiring careful positioning.
Horridon: A massive dinosaur with waves of Zandalari trolls; requires crowd control and positioning.
Council of Elders: Part of a council of Zandalari leaders, each with unique abilities.
Tortos: A giant turtle with abilities like Rockfall and Whirlwind; requires dodging and managing adds.
Megaera: A hydra with multiple elemental heads; demands coordination and prioritization.
Ji-Kun: A giant bird; involves managing nests, eggs, and environmental hazards.
Durumu the Forgotten: Set in a maze-like room with visual effects and illusions, it includes a challenging maze phase.
Primordius: An experiment gone wrong; involves adapting to buffs, debuffs, and adds.
Dark Animus: Features smaller constructs that need to be managed and defeated.
Iron Qon: A mogu warrior with three elemental companions; each requires different tactics.
Lu’lin: Twin consorts of Lei Shen; requires coordination and dealing with celestial mechanics.
Lei Shen: The Thunder King and final boss; a multi-phase, intense battle.
Ra-den: An additional boss available only in the heroic version of the raid.
Note: The Throne of Thunder is not possible to solo in its current version due to the complexity and mechanics of the encounters.
Even though there are 13 encounters listed, there are more bosses, which will be covered in more detail later.
MoP Throne Of Thunder Loot
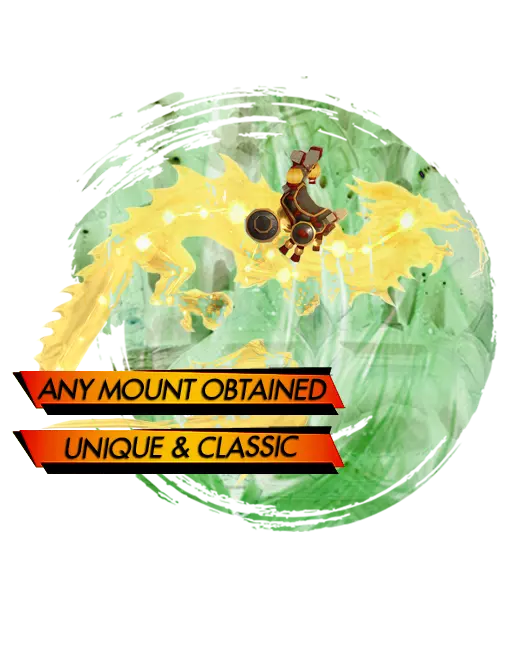
Each boss can give you one special item for different types of gear and classes. Also, there’s a chance you could get a Throne of Thunder mount from either Ji-Kun or Horridon.
If you don’t have these mounts yet, the Remix event is a great opportunity to add them to your collection.
MoP Remix ToT Raid
Jin’rokh The Breaker
To beat Jin’rokh the Breaker, use these simple strategies.
Tank Rotation:
Swap tanking Jin’rokh to handle Static Wound stacks.
Taunt off each other after Thundering Throw to reset threat.
Positioning in Conductive Water:
DPS and healers should stand in the latest Conductive Water zone until Lightning Storm.
Ranged players should move out if targeted by Focused Lightning.
Dealing with Focused Lightning:
Set safe spots for detonating Focused Lightning orbs, away from Conductive Water.
Keep orbs from hitting players in the water or Lightning Fissures.
Handling Thundering Throw:
Tanks should be ready to be thrown at the marked statue where Conductive Water appears.
Taunt Jin’rokh right after being thrown.
Adapting to Lightning Storm:
Stack in the center during Lightning Storm and use raid cooldowns to survive.
Leave Conductive Water to avoid extra Nature damage.
Optimizing DPS:
Save your DPS cooldowns for when standing in Conductive Water to increase damage.
Timing Heroism/Bloodlust:
Use Heroism/Bloodlust about 20 seconds after the first Conductive Water spawns to align with DPS cooldowns.
Learning the Encounter:
Focus on managing Focused Lightning and maximizing DPS during Conductive Water phases.
Heroic Mode Additional Mechanics:
Ionization:
Spread out before Ionization expires and safely dispel affected players.
Use immunities or self-dispels to reduce damage.
Lightning Strike:
During Lightning Storm, move around to avoid sparks from Lightning Strike.
Following these strategies will help you defeat Jin’rokh the Breaker.
Horridon
The Horridon fight is divided into five phases, each featuring different troll tribes and unique challenges. Here’s a simple breakdown:
General Tips:
Tank Rotation: Swap tanks to manage Horridon’s debuffs.
Door Management: After a minute, a Zandalari Dinomancer appears. Kill them quickly to close the door and stop reinforcements.
Phase Transition: Position carefully and handle tribe threats efficiently while keeping an eye on Horridon’s attacks.
Phase 1: The Farraki
Enemies: Sul’lithuz Stonegazers and Farraki Skirmishers.
Key Abilities:
Stone Gaze: Stuns players; interrupt this.
Blazing Sunlight: Fire DoT; dispel this.
Sand Traps: Avoid these expanding traps.
Strategy: Focus on killing Stonegazers quickly and avoid Sand Traps.
Phase 2: The Gurubashi
Enemies: Gurubashi Bloodlords and Venom Priests.
Key Abilities:
Rending Charge: Bleeding effect; heal quickly.
Venom Bolt Volley: Poison DoT; interrupt this.
Venomous Effusions: Avoid poison pools.
Strategy: Interrupt Venom Bolt Volley and avoid poison pools while managing Horridon’s attacks.
Phase 3: The Drakkari
Enemies: Risen Drakkari Champions and Frozen Warlords.
Key Abilities:
Deadly Plague: Disease DoT; dispel quickly.
Mortal Strike: Reduces healing; heal carefully.
Frozen Orbs: Avoid these freezing bolts.
Strategy: Dispel diseases and avoid Frozen Orbs.
Phase 4: The Amani
Enemies: Amani’shi Protectors, Flame Casters, and Warbears.
Key Abilities:
Fireball: Interrupt this.
Chain Lightning and Hex of Confusion: Dispel and avoid these.
Strategy: Interrupt Flame Casters and dispel harmful effects.
Phase 5: War-God Jalak
Key Focus: Kill War-God Jalak quickly to avoid his increasing damage.
Key Abilities:
Bestial Cry: High raid damage; use cooldowns and position well.
Strategy: Coordinate cooldowns, disarm Jalak if possible, and keep managing Horridon’s attacks.
By following these strategies, you can effectively handle each phase and defeat Horridon.
Council Of Elders
The Council of Elders is a challenging fight with four Trolls at once, testing your raid’s coordination and strategy.
Boss Abilities:
Frost King Malakk: Stacks debuffs on the tank and stuns them at 15 stacks. Targets players with Frost damage and causes them to damage allies. Empowered, he targets a raid member with Frost damage and applies Frostbite stacks.
Kazra’jin Charges at a random player, damaging and knocking back others. When empowered, he reflects damage taken as Nature damage.
Sul the Sandcrawler: Targets players with Nature damage and creates damaging sand pools. Empowered, he transforms these pools into adds that gain buffs.
High Priestess Mar’li: Targets raid members with Holy and Shadow damage. Summons spirits to heal allies or kill raid members.
Tactics and Strategy:
There is only one phase, but you need to defeat all four trolls.
Each troll has its own health pool, and one becomes empowered, casting a raid-wide damaging spell until losing 25% health.
Manage each troll’s abilities while balancing raid positioning and resources.
Tanks manage boss positioning and debuffs, healers handle sustained raid damage, and DPS prioritize targets and coordinate burst damage.
Emphasizes positioning, interrupts management, and add control.
Spread out to minimize damage, interrupt key spells, and efficiently handle additional enemies.
Strategic planning, clear communication, and adaptability are essential.
By understanding boss mechanics, coordinating efforts, and executing roles precisely, victory can be achieved.
Understanding each boss’s mechanics, coordinating effectively, and executing roles precisely are key to overcoming the Council of Elders in the Throne of Thunder raid.
Tortos
In this next challenge, the mechanics aren’t too complex, but the fight’s difficulty remains high.
Now, onto Tortos’ abilities:
Furious Stone Breath: Deals massive raid-wide damage every 45 seconds, interruptible by kicking a Whirl Turtle add at the boss. The frequency of casts is indicated by Tortos’ Fury bar.
Rockfall: Throughout the fight, stalactites fall, dealing high damage within 5 yards of impact and lower damage within 20 yards.
Quake Stomp: Cast regularly, stunning all players for 1 second, and dealing 65% of their maximum health as Physical damage. Also increases Rockfall frequency for 8 seconds.
Snapping Bite: Tortos uses this damaging ability against his current target every 8-10 seconds.
Additionally, there are two adds:
Whirl Turtle: Summoned every 60 seconds, it deals damage with Spinning Shell. Can be kicked to interrupt spells.
Vampiric Cave Bat: Appears every 30 seconds, uses Drain the Weak, dealing damage and healing itself if the target’s health is low.
Tactics and Strategy:
Strategy-wise, keep Tortos engaged in melee range to prevent frequent Furious Stone Breath casts. Assign one player to consistently kick Whirl Turtles towards Tortos to interrupt his spells, with a backup in case. Tanks should handle Tortos and the bats, positioning them for optimal DPS. Ranged DPS focus on Whirl Turtles, while melee DPS split between Tortos and bats. Ensure a Whirl Turtle is available for each Furious Stone Breath cast by eliminating them promptly.
Megaera
Megaera is the fifth encounter, a battle against a hydra with multiple heads.
Megaera has 3 heads, each with different abilities based on their location.
When near the arena, the heads have these abilities:
Flaming Head: Cinders deal instant damage and damage over time, creating fiery void zones when dispelled.
Frozen Head: Torrent of Ice chases a player, dealing Frost damage and leaving icy void zones.
Venomous Head: Rot Armor deals Nature damage and increases damage taken per stack.
Tactics and Strategy:
The tactic is to kill 7 heads, damaging them when near the arena and enduring their abilities when away. Here’s a simplified strategy:
Focus damage on one head near the platform, preferably Frozen Head first.
Endure the raid-wide damage from Rampage while stacked together after one head is defeated.
Spread out and have tanks pick up the remaining heads, facing them away from the raid.
Handle abilities from heads at the back: run over icy void zones for Cinders, kite Torrent of Ice away, and move from Acid Rain impact.
Tanks switch heads before Rampage ends to prevent debuff stacking.
Balance killing heads to avoid excessive stacks of Hydra Frenzy and use healing and defensive cooldowns during Rampage phases.
Maintaining this balance and strategy will lead to success against Megaera.
Ji-Kun
Ji-Kun, a massive bird boss, commands the nest atop her platform. The encounter is all about managing nests, eggs, and adds while handling Ji-Kun’s abilities like Quills and Talon Rake.
The boss has five main abilities:
Infected Talons: A Nature DoT on the tank that stacks.
Talon Rake: An attack that increases damage taken from Talon Rake.
Down Draft: Periodic pushback, requiring players to move towards Ji-Kun.
Caw: Targets raid members with sound waves, dealing damage within a radius.
Quills: Channels an AoE attack, damaging players on the platform and nests below.
Ji-Kun spawns adds:
Feed Young: Feeds Hatchlings below or spawns slime balls on the platform. Intercepting slime grants a damage/healing buff.
Tactics and Strategy:
The fight unfolds in a single phase, focusing on managing nests, adds, and Ji-Kun’s abilities. Tanks swap to manage debuffs, while raid members rotate between nests and the platform.
Tank Rotation: Alternate tanking to manage debuffs.
Nest Management: Assign groups to clear nests and intercept slime balls.
Platform Spread: Spread out to minimize damage and run towards Ji-Kun during Down Draft.
Feed Pools: Intercept slime balls to prevent Feed Pools from spawning on the platform. Stand in existing pools to despawn them.
Healing Focus: Be ready for high raid damage during Quills.
DPS Boost: Stack Primal Nutriment buff for increased raid DPS in 25-man; use spare Flight charges for interception in 10-man.
Durumu the Forgotten
Durumu the Forgotten is a challenging encounter that requires precise execution and awareness of his various mechanics. The fight revolves around managing his gaze attacks, navigating maze-like visual effects, and handling adds appropriately. Effective coordination and awareness are vital for avoiding lethal effects and defeating Durumu.
Abilities:
Normal Phase:
Hard Stare: Damaging attack that reduces healing received and applies a bleed effect.
Force of Will: Cone effect that knocks back raid members.
Life Drain: Summons a Hungry Eye that channels Life Drain on a raid member, restoring health to Durumu.
Colorblind Phase:
Beams target players with corresponding colors, creating damaging cones on the ground.
Tactics and Strategy:
Normal Phase:
Tanks should swap to manage debuffs.
Avoid void zones and knockbacks.
Intercept Life Drain to minimize healing on Durumu.
Colorblind Phase:
Assign players to beams based on their color.
Focus on revealing and killing adds while avoiding revealing harmful ones.
Use healing cooldowns to manage raid damage.
Disintegration Beam Phase:
Stand in safe zones to avoid being killed by the Disintegration Beam.
Avoid stepping on harmful areas.
Continue moving with the safe zones as they expand.
By executing these strategies, your raid should be able to overcome Durumu the Forgotten’s mechanics and emerge victorious.
Primordius
The eighth adversary boasts an array of skills; however, the confrontation is not excessively demanding.
Following 8 minutes of combat, the boss enters a Berserk state, significantly amplifying its damage output, posing a lethal threat to the entire party within the subsequent 10 seconds.
Primordius exhibits a variety of abilities, evolving throughout the battle to acquire new ones:
Primordial Strike: A frontal cone attack inflicting substantial Physical damage, cast every 20 seconds. Tanks must withstand this assault.
Malformed Blood: A stacking debuff causing Nature damage every 3 seconds and enhancing damage against Living Fluids, necessitating tank rotation.
Mutated Abomination: A buff reducing damage from non-Fully Mutated players.
Evolution: A buff gained upon reaching maximum mutation capacity, enhancing damage output by 10% and granting one of several abilities:
Caustic Gas: Deals high Nature damage, distributed among players within 25 yards.
Acidic Spines: Targets random raid members with projectiles, damaging nearby players.
Volatile Pathogen: Applies a debuff dealing significant Nature damage over time.
Metabolic Boost: Increases attack speed and reduces ability cooldowns.
Erupting Pustules: Launches projectiles dealing Nature damage across the room.
Strategic coordination is essential for success against Primordius:
Optimize DPS Allocation: Assign roles based on mutation status, with non-mutated DPS focusing on eliminating Living Fluids for beneficial buffs, while fully mutated DPS concentrate on damaging Primordius directly.
Manage Buff Acquisition: Secure Mutagenic Pools to acquire buffs efficiently, prioritizing high-DPS players to maximize their uptime on the boss. Once fully mutated, refrain from touching Mutagenic Pools to avoid detrimental debuffs.
Respond to Boss Abilities: Employ appropriate tactics to counteract boss abilities, including healing through Ventral Sacs, distributing damage for Caustic Gas, spreading out for Acidic Spines, providing intensive healing for targets afflicted by Pathogen Glands, and evading Erupting Pustules.
Adaptation: Adjust strategies to cope with conflicting abilities, potentially allowing Living Fluids to reach Primordius during such phases to expedite the removal of detrimental effects through Evolution stacks.
By implementing these strategies effectively, raiding parties can overcome the challenges posed by Primordius and emerge victorious.
Dark Animus
Dark Animus employs a special resource called Anima, activating abilities based on consumed Anima:
Siphon Anima: Drains 1 Anima from golems every 6 seconds, killing them.
Touch of the Animus: Places Fire damage debuff on a random raid member.
Anima Ring: Sphere ring around a target increases melee damage taken.
Anima Font: Inflicts damage on nearby allies when a debuffed player is cast upon them.
Interrupting Jolt: Deals Nature damage, interrupts spellcasting, and silences.
Full Power: Channels high damage to random raid members, causing quick wipes.
Accompanying Dark Animus are three types of adds:
Anima Golem with Acceleration Link.
Large Anima Golem with Crimson Wake.
Massive Anima Golem with Matter Swap and Explosive Slam.
To manage Anima:
Assign tanks and plate DPS for Anima Golems, spread apart to prevent Acceleration Link.
Strategically kill Anima Golems to transfer Anima to Massive Anima Golems.
Activate Dark Animus when few Anima Golems remain to slow Anima drain, aiming for 36 initially.
Avoid activating Large Anima Golems due to disruptive abilities like Crimson Wake.
For abilities:
Promptly dispel Matter Swap and avoid Explosive Slam. Tank Massive Anima Golems in the middle.
Exit Anima Ring promptly to prevent increased melee damage.
Ensure debuffed players stay away from others. Beware of interrupting Jolt; halt spellcasting.
Final push:
Defeat Dark Animus before reaching 100 Anima. With effective Anima management and skillful handling, victory is within reach.
Iron Qon
Iron Qon presents multiple phases, each with distinct mechanics, but they are relatively easy to understand and manage.
Iron Qon utilizes various mounts, each granting different abilities:
Phase One: Burning Cinders apply a DoT on the ground; Molten Overload increases damage and casts Molten Inferno; and Unleashed Flame targets a stacked group with a damaging ability.
Phase Two: Storm Cloud Strike causes lines of lightning; Arcing Lightning stuns a raid member; and Windstorm summons tornadoes, pulling players towards the center.
Phase Three: Freeze Spear freezes the ground, Dead Zone nullifies damage from specific sides, Frozen Resilience reflects damage back to attackers, and Freeze debuffs a raid member.
Phase Four: Rising Anger gains stacking damage buff, Fist Smash deals raid-wide Physical damage, Ignite Cyclone ignites a tornado, and Freeze Cyclone freezes a tornado.
Tactics and Strategy:
In Phase One, coordinate to counter Ro’shak’s attacks, stack up to absorb Unleashed Flame, avoid magma lines, and focus DPS on Ro’shak.
Phase Two requires awareness of lightning lines, freeing trapped players, and avoiding tornadoes while damaging Quet’zal.
Phase Three demands continuous DPS on Dam’ren, evasion of frost lines and tornadoes, and strategic attack during Dead Zone phases.
In Phase Four, stack in a tornado-free zone, use cooldowns and buffs, and prioritize DPS to prevent excessive Rising Anger stacking.
Effective management of mechanics and communication ensures victory over Iron Qon.
Lu’lin
In this boss encounter, you’ll face two enemies with separate health pools. Your raid party will be wiped after 13 minutes and 36 seconds, and there’s a hard enrage timer set at 10 minutes. Both bosses have equal amounts of HP. The encounter consists of four phases, each with specific abilities used by both bosses.
The final phase and the outcome of the boss battle hinge on which boss you defeat in the preceding phase.
Twin Consorts: Tactics and Strategy
The encounter comprises four phases:
Darkness: Lasts 3 minutes, fighting Lu’lin with Suen’s support.
Daylight: Lasts 3 minutes, fighting Suen with Lu’lin’s support.
Break of Dusk: Fighting both bosses until one is killed.
Final phase: Reflects the phase of the last remaining boss.
A unique aspect is the presence of Celestials:
Niuzao: Fortitude of the Ox.
Chi-Ji: A Rush of Cranes.
Yu’lon: The Serpent’s Vitality.
Xuen: The Tiger’s Celerity.
They can provide buffs if specific tasks are completed to earn their assistance.
Darkness Phase:
Maintain distance to minimize damage from Cosmic Barrage and Light of Day.
Avoid sleep-inducing clouds from Bloom Moon Lotus.
Assign tanks to Lu’lin and the Beast of Nightmares.
Apply Damage over time effects during Tears of the Sun.
Daylight Phase:
Manage Suen’s Blazing Radiance stacks by positioning them near Ice Comets.
Alternate tanking Suen to manage Fan of Flames debuff.
Move away if targeted by Ice Comet projectiles.
Break of Dusk Phase:
Focus on quickly defeating one boss, preferably Suen.
By coordinating and adapting tactics to each phase, victory over Lei Shen in the Throne of Thunder raid is achievable.
Ra-den
Ra-den is the true final boss battle on Heroic difficulty in the Throne of Thunder raid, featuring a 10-minute enrage timer. Here’s how to defeat him:
Throughout the fight:
Unstable Vita: Assign players to run to designated markers. Ensure the tank is always closer than the players exchanging Vita.
Crackling Add: DPS the add down, stun it at 20%, knock it away from the group, and finish it off. Prepare for its AoE explosion.
Phase 1 (100%–40%)
Materials of Creation: Ra-den summons red (Anima) and blue (Vita) balls. Ranged DPS must focus on the red balls:
Eliminate the first, second, and third red balls.
Let the 4th red ball hit Ra-den.
Kill the 5th and 6th red balls.
Let the 7th red ball hit Ra-den, bringing him to around 40% health.
Transition to Phase 2 (40%–5%)
Ruin: Ra-den starts using Ruin, a raid-wide damage ability. Use rotating raid cooldowns to mitigate the damage.
Ignore Balls: In Phase 2, ignore all balls and focus on burning down Ra-den.
Burst Damage: Be prepared for burst damage when Ra-den hits 40% health and uses Ruin in conjunction with the last hit from Materials of Creation.
By coordinating effectively, managing the abilities and phases, and focusing on the proper targets at the right times, you can defeat Ra-den and emerge victorious in this final, heroic battle.
Let’s Sum It Up!
Facing 13 bosses is a significant challenge, taking hours to complete. For those new to the raid, it may take even longer. We hope this guide helps you navigate each encounter smoothly. Though the raid and its bosses are old, many players have yet to experience it. It’s been over 10 years since we last visited Pandaria, and many WoW fans may have forgotten it.
Now, with this knowledge, you’re ready to defeat each boss. Support each other, take a breather before each encounter, and discuss your strategy before entering each arena. Follow these steps, and victory will be yours.
F.A.Q.
How many bosses are in Throne of Thunder?
In this raid, you will face 13 bosses: 12 in standard mode and 1 unlocked in heroic mode.
Jin’rokh the Breaker
Horridon
Council of Elders
Tortos
Megaera
Ji-Kun
Durumu the Forgotten
Primordius
Dark Animus
Iron Qon
Twin Consorts
Lei Shen
Ra-den (heroic mode)
Who is the first boss in WoW MoP Throne of Thunders?
Jin’rokh the Breaker will be the first one you challenge.
Who is the last boss in WoW MoP Throne of Thunders?
In normal mode, it is Lei Shen; in heroic mode, it is Ra-den.
What mounts can be obtained from bosses in WoW MoPRemix Throne of Thunder?
You can obtain two mounts from bosses in that raid:
Raid report is a website dedicated to Destiny 2 players. It provides valuable information related to Destiny 2 raids, including stats, leaderboards,...


 Based on 4 128 reviews