

We’re finally able to take a closer look at what the new season is going to look like. This one is probably the biggest balance patch...
Some leveling builds need patience. This one does not. Behold, the best PoE 2 0.5 starter build ever!
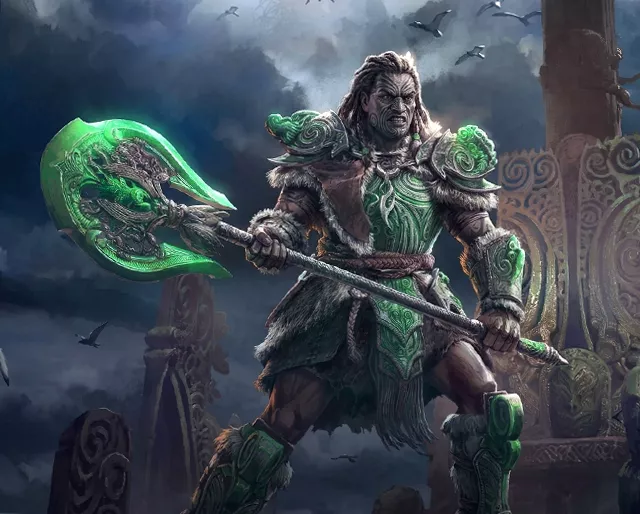
The Twister Whirling Slash setup is one of the strongest league starters you can play in Path of Exile 2 Return of The Ancients, especially if your goal is simple: move fast, delete packs, melt bosses, and avoid that painful early-campaign slog where your character feels like it is fighting with wooden tools. This build starts working almost immediately. You pick up Whirling Slash, grab Twister, start stacking buffs, and the whole thing keeps getting stronger with every act.
Then Act 2 happens. Once you unlock Frost Nexus and combine it with Ice-Tipped Arrows, the build stops feeling like a normal campaign setup. Twister turns into a cold damage engine, chilled ground starts boosting your damage, Herald of Ice begins chain-exploding packs, and bosses suddenly look a lot less intimidating. The best part? You do not need to wait until endgame for the build to feel good. It comes online early, works on both Huntress and Monk, and scales naturally from level 2 all the way through the campaign.
| Category | Details |
|---|---|
| Main Skill | Twister |
| Setup Skill | Whirling Slash |
| Best Classes | Huntress, Monk |
| First Big Power Spike | Act 2 with Frost Nexus |
| Damage Type | Starts physical, scales hard with cold conversion |
| Clear Style | Twister damage plus Herald of Ice explosions |
| Boss Style | Stack Whirling Slash, apply buffs, burst with Twister |
| Weapon Priority | Fast spear for Whirling Slash, high damage spear for Twister |
The whole build is built around one very simple idea – Whirling Slash prepares the damage. Twister delivers it.
You use Whirling Slash several times to build up your setup, then attack with Twister and let the tornadoes do the real work. Early on, this already feels strong enough to carry you through Act 1. But the build becomes much more interesting once cold conversion enters the picture. With Ice-Tipped Arrows, Twister becomes cold-based. That unlocks Frost Nexus, chilled ground scaling, Elemental Armament, Herald of Ice interactions, and later even more projectile scaling through Spirit Walker.
And because these upgrades arrive during the campaign, not after it, you get to enjoy the power spike while leveling instead of waiting until maps.
Act 1 is where you build the foundation. You start on the beach and pick up Whirling Slash. After killing the Miller, grab Twister from Renly and take Frost Bomb from the Clearfell gem.
At this point, your gameplay loop is already active:
| When | What to Do |
|---|---|
| Beach | Pick up Whirling Slash |
| After Miller | Get Twister from Renly |
| Clearfell gem | Take Frost Bomb |
| First support | Use Retreat 1 on Twister |
| Red Vale | Upgrade Twister with the level 2 skill gem |
| Level 5 | Look for an Ironhead Spear |
| After Rotten Druid | Take Rage 1 for Whirling Slash |
| Level 6 | Pick up Fangs of Frost |
The Red Vale league mechanic gives you a Level 2 Skill Gem. Use it to upgrade Twister. This makes the Rust King fight much easier and gives your damage a clean early boost. At level 5, check Refined Arms or the vendor for an Ironhead Spear. Do not spend real currency here. A transmute or augment is fine, but save your better crafting resources for later. After killing The Rotten Druid, take Rage 1 for Whirling Slash. This is a great early upgrade because you generate Rage by hitting enemies, and that Rage also increases your Twister damage.
It barely helps your damage, and the higher mana cost makes the build feel worse. Whirling Slash is there to stack and trigger effects. Twister is your real damage skill.
For bosses, your early setup becomes more deliberate. Use Parry, then follow with Fangs of Frost to consume the parry debuff and create Chilled Ground. This gives your Twisters 50% damage gained as cold, which is a huge boost for early boss fights.
After completing Freythorn, grab War Banner and link it with Prolonged Duration 1. War Banner gives you a strong single-target window, especially when you pre-stack before a boss appears. At level 10, go back to town and check Renly for a Hunting Spear. Look for:
This gives your boss setup another layer. Before a boss spawns, pre-stack Whirling Slash, use Barrage, then attack with Twister. When War Banner is ready, drop it for more attack damage and increased attack speed. On fights like Geonor, this is where the build starts showing its teeth.
Act 2 is the turning point. This is where Twister stops being just a good leveling skill and starts becoming something that feels completely unfair. Your first major upgrade comes from the Raided Camp in Vastiri Outskirts. Take your first Tier 2 support gem and use it for – Frost Nexus on Twister.
This is the first huge power spike. Ice-Tipped Arrows converts Twister into cold damage. Frost Nexus then lets your Twister create chilled ground while you fight. That chilled ground gives another huge damage boost. From this point onward, packs start disappearing fast, and bosses begin to melt. You can now drop Parry and Fangs of Frost. Frost Nexus takes over the chilled ground job, so the older boss setup is no longer needed.
Act 2 also introduces one of the most important parts of the build: two weapon sets. You want:
| Weaqpon Set | Use | What You Want |
|---|---|---|
| Weapon Set 1 | Whirling Slash | Fast Winged Spear, attack speed preferred |
| Weapon Set 2 | Twister | Highest average damage spear |
This matters because Whirling Slash and Twister care about different stats.
Whirling Slash wants speed – you use it to stack stages quickly, so attack speed makes it feel better.
Twister wants average damage per use – attack speed is not the big deal here. The important number is how much damage each Twister use delivers.
When checking a new spear, put it into Weapon Set 2, open your Twister gem, and compare the average damage per use. If that number goes up, you found an upgrade. Also, make sure Ice-Tipped Arrows is linked to Weapon Set 2 with Twister. Move Barrage to Weapon Set 1. This becomes more important later once Dance with Death enters the setup.
At level 20, Frost Bomb stops applying exposure, so you can drop it. Then comes the next huge upgrade. At level 21, check Shambrin for a War Spear. You want the same damage stats as before:
This time, if you find a strong base, it is actually worth investing. Use a regal or essence. Exalt it. Add quality. Put in a Lesser Storm Rune. A good War Spear here can carry your damage for a long time, so this is one of the first moments where spending currency makes sense. In the Buried Shrines, the league mechanic gives you a guaranteed Lesser Jeweller’s Orb. Use it on Twister and add Elemental Armament 2.
That is another massive damage jump. For your first level 7 gem, take Freezing Mark. It helps freeze bosses more consistently, speeds up chilled ground generation, and adds another damage gained as cold bonus. By the end of Act 2, the build should feel wild. Bosses freeze often, packs explode through Herald of Ice, and Twister starts carrying fights almost by itself.
Act 3 is where the campaign starts hitting back. Your damage should already feel excellent, but monster damage ramps up enough that you cannot ignore defenses anymore. This is the part where bad gear starts getting punished. First, grab a Tier 3 support gem from the Sandswept Marsh league mechanic and use it for Retreat 2 on Twister. Easy damage multiplier, no drama. Once you reach town, check Oswald for a Jagged Spear. Same rule as before – flat physical damage or increased physical damage. If your weapon falls behind in Act 3, you will feel it immediately.
| Gear Slot | Priority |
|---|---|
| Weapon | Physical damage |
| Helmet | Life and resistances |
| Body Armour | Life and resistances |
| Gloves | Damage |
| Boots | Movement speed |
Your helmet and body armour need to do the defensive work now.
Look for a Scout’s Vest and Hunter Hood with life and elemental resistance. You do not need perfect gear, but you do need enough defensive stats to stop random hits from deleting you. The new Runic Ward system in 0.5 also helps the build survive better, but do not use that as an excuse to ignore life and resistances.
Around Act 3, you may notice one annoying issue. When Ice-Tipped Arrows freezes a boss, it can sometimes interfere with Frost Nexus and make chilled ground generation less consistent – the solution is Elemental Focus.
Elemental Focus prevents Ice-Tipped Arrows from freezing. That sounds bad for about half a second, then you realize it also gives another 25% more damage multiplier and makes chilled ground generation consistent. That is a massive upgrade. Once Elemental Focus is online, boss fights become much smoother. Rares die almost instantly, bosses get crushed during freeze windows, and Herald of Ice starts turning pack clearing into a fireworks show.
By Act 4, the build is already fully working. You are not trying to make it functional anymore. You are just making it nastier. >Your next upgrades are:
| Upgrade | Where / When |
|---|---|
| Rapid Attacks 2 for Whirling Slash | Beast Pen in Isle of Kings |
| Rage 2 for Whirling Slash | Act 4 progression |
| Cooldown Recovery 2 for Ice-Tipped Arrows | Support upgrade |
| Crossblade Spear ilvl 46+ | Start checking bases |
| Humming Pearl | Singing Caverns |
| Greater Jeweller’s Orb | Ngakanu league mechanic |
Start looking for a Crossblade Spear with item level 46 or higher. Press Alt to check item level. At item level 46, the spear can roll stronger physical modifiers. If you get a good base here, it can carry you into early maps. In Singing Caverns, grab the Humming Pearl and hand it to Rog. Once you get your amulet, anoint Initiate for a very efficient full-life damage boost. Later in Ngakanu, the league mechanic gives you a guaranteed Greater Jeweller’s Orb. Use it on Twister and add Ice Bite 2 for now. Once you unlock Tier 5 supports, replace Ice Bite 2 with Projectile Acceleration 3.
Once Tier 5 supports are available, the build gets its final campaign form. Make these swaps:
| Skill | Upgrade |
|---|---|
| Twister | Swap Ice Bite 2 to Projectile Acceleration 3 |
| Mark | Replace Freezing Mark with Charged Mark |
| Whirling Slash | Upgrade Rage to Rage 3 |
| Whirling Slash | Use Rapid Attacks 3 |
| Thunderous Leap | Use Rapid Attacks 3 |
Charged Mark gives guaranteed Shocked Ground, which adds another strong damage layer. At this stage, the campaign should feel completely under control. Bosses often die inside a single freeze window. Rares vanish before they become a threat. Packs explode from Herald of Ice before you even fully register what was on the screen.
The broken part is the way Ice-Tipped Arrows changes Twister.
Twister starts as a strong physical skill, but once Ice-Tipped Arrows converts it into cold damage, it suddenly gets access to a pile of extra scaling. You get cold damage. You get chilled ground. You get Elemental Armament. You get Herald of Ice chain explosions. You get better freeze pressure. Then the build keeps adding projectile scaling on top. That is why the damage jumps so hard in Act 2. It is not one single overpowered gem doing everything. It is several damage layers multiplying together very early in the campaign.
And in 0.5, Primal Bounty from Spirit Walker makes the whole thing even crazier.
At first, Primal Bounty already looks strong because it gives additional projectiles and projectile speed. But after taking the second node and scaling the effect, you can reach six additional projectiles and more than 200% increased projectile speed. For Twister, that is absurd. More projectiles means more tornadoes. More projectile speed means better coverage. Better coverage means more hits, faster clearing, smoother Herald of Ice chains, and much stronger campaign momentum. That is why the build feels so far ahead of most leveling setups.
The Twister Whirling Slash build is exactly what a league starter should be. It starts early. It scales naturally. It has clear upgrade points. It does not need some late-game miracle item before it becomes fun.
If you want a fast leveling build for PoE 2 Return of The Ancients that clears hard, melts bosses, and feels powerful long before maps, this is one of the best options to play.