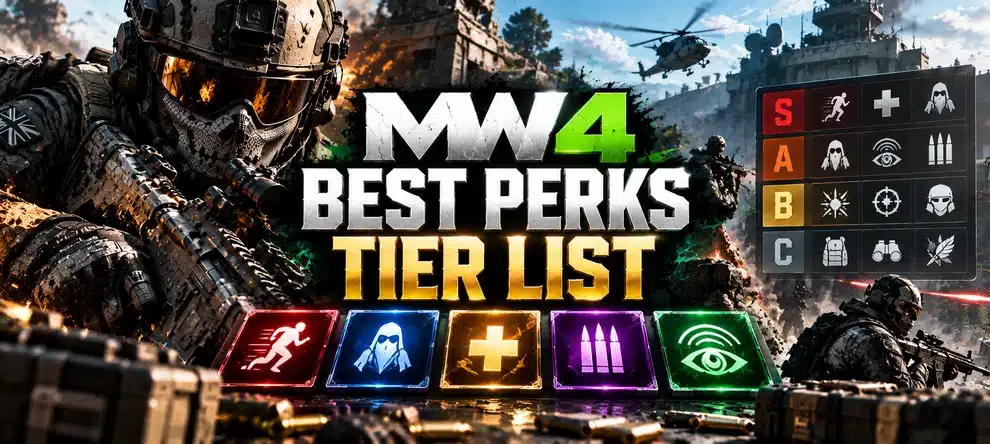
What are the best perks in Modern Warfare 4? For the officially documented beta version, Quick Fix helps you survive repeated objective fights, Ninja favors quieter flanks, Fast Hands improves weapon handling, and Blood Rush supports high-mobility play. None is the best pick in every match: the weapon you carry and the job you take on a team matter more than a one-size-fits-all loadout.
This MW4 best perks tier list ranks 15 perks individually described in Activision’s beta guide. It covers Multiplayer, not DMZ or Warzone, and uses the published Pick 3 slots as its reference. The full game launches October 23, 2026, so treat perk-slot positions and movement-sensitive picks as a beta-based starting point rather than a claim about an untested launch build.
Best MW4 Perks at a Glance
If you are creating a class right now, start with your role rather than copying a list of three individually strong perks. These combinations fit the published beta slot layout.
| Your goal | Perk 1 | Perk 2 | Perk 3 | Why it works |
|---|---|---|---|---|
| Fast respawn fights | Quick Fix | Fast Hands | Blood Rush | Recover between engagements, reload quickly and reposition |
| Quiet flanks | Ninja | Fast Hands | Scavenger | Approach less audibly, swap fast and keep the primary fed |
| Hardpoint / Domination | Quick Fix | Bomb Squad | Battle Hardened | Stay effective while contesting grenade-heavy objectives |
| Recon-conscious defender | Ghost | Hardline | Cold-Blooded | Combine concealment from different detection tools with a streak-oriented plan |
| Sniper with another primary | Overkill | Fast Hands | Scavenger | Carry two primaries and keep their transitions manageable |
For the guns to pair with these combinations, see our MW4 Best Weapons Tier List. For sightlines and objective routes, use the MW4 Multiplayer maps guide.
MW4 Best Perks: Quick Facts
Play Your Own Matches or Prepare Your Favorite Guns
Once you have chosen your perk role, your next choice is how you want to play and whether the weapons in that class still need attachment unlocks. A hosted session is selfplay Multiplayer; weapon leveling is a separate piloted service and does not automatically unlock perks.
MW4 Perks Tier List: S, A, B and C
We rank perks by how often they solve a real Multiplayer problem: winning a second gunfight, getting into position without giving yourself away, handling a reload under pressure, surviving objective utility or making a loadout more flexible. A perk can be excellent for one role without being a universal S-tier choice. This is an editorial assessment of published effects and late-beta changes, not a statistical measurement of launch pick rates or win rates.
| Tier | Perk | Beta slot | Best reason to use it |
|---|---|---|---|
| S | Quick Fix | 1 | Health regeneration during consecutive kills and objective captures |
| S | Ninja | 1 | Quieter footsteps for flanks and tactical routes |
| S | Fast Hands | 2 | Faster reload, weapon switching and equipment use in most classes |
| S | Blood Rush | 3 | Mobility and Tactical Sprint in the late-beta test |
| A | Ghost | 1 | Hiding from multiple enemy reconnaissance tools |
| A | High Alert | 1 | Warning when an unseen enemy spots you |
| A | Bomb Squad | 2 | More protection against explosive pressure |
| A | Hardline | 2 | Lower Killstreak costs for players who can capitalize on them |
| A | Battle Hardened | 3 | Reducing disruption from enemy Tactical equipment |
| B | Overkill | 1 | Two primary weapons for specialized range coverage |
| B | Scavenger | 3 | Restocking ammo without relying on frequent respawns |
| B | Tracker | 2 | Enemy footprints and concealed kill markers; beta default class |
| B | Combat Grid | 3 | Highlighting equipment, upgrades and vehicles; beta default class |
| B | Cold-Blooded | 3 | Countering AI targeting and certain reconnaissance tools |
| C | Lethal Reach | 3 | Farther equipment throws and its dedicated melee utility |
How to read B and C: these perks are not broken. They simply solve narrower problems or compete with more broadly useful choices in the same beta slot. The Tracker and Combat Grid entries describe beta default-loadout capabilities; do not assume they were freely selectable in every custom class.
How the MW4 Pick 3 Perk System Works
MW4 puts one perk in each of three slots. You cannot combine two Perk 1 choices, even if both are S-tier. This single rule matters more to a usable loadout than the position of any one perk in a ranking.
| Beta slot | Perks described by Activision | Main trade-off |
|---|---|---|
| Perk 1 | Overkill, Ninja, High Alert, Quick Fix, Ghost | Two primaries vs stealth vs awareness vs recovery |
| Perk 2 | Fast Hands, Hardline, Bomb Squad, Tracker | Handling vs streaks vs explosive protection vs tracking |
| Perk 3 | Scavenger, Lethal Reach, Blood Rush, Combat Grid, Battle Hardened, Cold-Blooded | Ammo vs throws vs mobility vs intelligence vs counters |
Can you equip Ninja and Ghost together? Not in the officially listed beta build: both are Perk 1, so you must choose. Similarly, Ninja and Quick Fix cannot occupy the same beta class. This is why a guide that simply stacks three popular perk names can give you an impossible recommendation.
Activision’s broad Multiplayer overview describes an 18-perk offering, while its detailed beta perk table gives names and effects for the 15 entries above. We do not assign launch effects or slots to the remaining announced options before a reliable full roster is published. If the final build changes which perk goes in which slot, update your combinations from the in-game Create a Class screen rather than forcing an old beta layout.
Best Perk 1: Quick Fix, Ninja or Ghost?
Quick Fix — S-tier for players who contest objectives
Quick Fix triggers health regeneration after eliminations and while capturing objectives. Its value becomes obvious when you win a close fight but have no time to sit behind cover: it supports the next engagement rather than helping only your opening shot. It is our first choice for Hardpoint, Domination and aggressive respawn classes that spend a lot of time under pressure.
It does not make a poor peek safe or cancel all damage. A player who repeatedly dies before securing an elimination will benefit less than someone who can regularly convert a fight into a second push.
Ninja — S-tier when footsteps decide the engagement
Ninja reduces footstep noise. It suits wide flanks, careful approaches in Search and Destroy and players who work around a defended position instead of challenging its strongest sightline. Its downside is a real opportunity cost: in the published beta layout, taking Ninja means giving up Quick Fix, Ghost and High Alert in that slot.
Ninja should not be treated as guaranteed silence. Use timing, cover and route selection too. If the lobby is won through continuous objective trading rather than hidden approaches, Quick Fix may deliver more practical value.
Ghost and High Alert — two different information answers
Ghost reduces detection by multiple reconnaissance tools, which matters when the opposing team relies on information to hold routes. High Alert warns when an enemy you have not seen spots you. Both are useful, but they solve opposite sides of the information fight: concealment versus warning. Pick based on how you lose engagements, not on a presumed universal meta.
Overkill belongs to the same slot and earns its place when carrying two primary weapons genuinely changes your class: for example, a sniper with a versatile close-range primary. If you rarely switch between them, you are spending Perk 1 on an advantage you barely use.
Best Perk 2: Fast Hands, Bomb Squad or Hardline?
Fast Hands is our most flexible Perk 2. Faster reloads, equipment use and swaps help on almost every map, especially when using a slower weapon or transitioning between a sniper and a secondary primary. It does not improve the firearm’s raw damage, but can reduce the time you are unable to return fire.
Bomb Squad moves up the priority list when explosives consistently disrupt a control point. It can be more valuable than Fast Hands for a teammate tasked with breaking a fortified Hardpoint. Hardline reduces the cost of Killstreaks by one; take it only if you regularly earn and use those streaks, rather than assuming it will compensate for losing every opening duel.
Tracker provides enemy footprints and conceals your kill markers in the beta documentation. It is a useful pursuit perk, particularly on maps with multiple escape routes, but the published beta guide lists it as a Default Class Only option. That restriction matters when building a reproducible custom setup.
Best Perk 3: Blood Rush, Battle Hardened and the Rest
Blood Rush is the standout mobility choice in the late beta. Infinity Ward experimented with removing default Tactical Sprint and tying it to Blood Rush, together with stamina and movement adjustments. That makes Blood Rush unusually valuable in a beta movement setup built around aggressive repositioning. It also makes this rating more sensitive to launch tuning than most others in the table.
Battle Hardened reduces the effects of enemy Tactical equipment. Pairing it with Bomb Squad gives an objective class a way to handle two different types of incoming utility. In the beta patch notes, the developers also added Battle Hardened to temporary spawn protection, another sign it was under active tuning.
Scavenger is strong when you survive long enough to run low on ammunition. Cold-Blooded helps against AI targeting and certain enemy reconnaissance tools, particularly when those are the real reason your positions are being broken. Combat Grid highlights enemy equipment, Field Upgrades, Killstreaks, vehicles and teammates, making it a useful awareness tool, but was beta default-class restricted.
Lethal Reach remains a specialist rather than a default recommendation: farther equipment throws, a trajectory preview and its melee utility can be useful for planned plays, but most players benefit more often from mobility, resistance or ammunition. Try it with an intentional equipment-focused class, not simply because a tier chart has an empty Perk 3 slot.
Five MW4 Perk Setups Worth Testing
These are beta-slot-legal examples, not universal launch prescriptions. Equip the weapons and equipment that suit the role, then check whether your version of Create a Class offers the same slot arrangement.
| Build | Three perks | Play it like this | When to change it |
|---|---|---|---|
| Objective entry | Quick Fix / Bomb Squad / Battle Hardened | Contest the point after utility is thrown; prioritize staying present for a second fight | Trade Bomb Squad for Fast Hands if explosives are not the obstacle |
| Mobile respawn | Quick Fix / Fast Hands / Blood Rush | Take a fight, recover, rotate quickly and keep the pressure on | Use Battle Hardened instead of Blood Rush when Tactical spam stops your pushes |
| Quiet flanker | Ninja / Fast Hands / Scavenger | Choose side routes and keep movement quiet rather than challenging a held center lane | Try Cold-Blooded if AI targeting is the recurring problem |
| Recon-conscious hold | Ghost / Hardline / Cold-Blooded | Play a repeatable defensive lane, avoid enemy recon and work toward helpful streaks | Swap Hardline for Bomb Squad if objectives are consistently cleared by grenades |
| Two-primary flexibility | Overkill / Fast Hands / Scavenger | Cover long and short lanes with two primaries, swapping instead of forcing the wrong range | Drop Overkill if one primary plus your normal secondary handles both ranges |
Use the MW4 Best Settings guide to make sure sensitivity, FOV and audio do not undermine your intended approach. For practical match choices, see our All Maps reference; the best flank perk is far less useful if you always repeat the same exposed route.
Best MW4 Perks by Mode and Weapon Style
Hardpoint and Domination: start with Quick Fix. Use Bomb Squad and Battle Hardened when the enemy clears the zone with explosives and Tactical equipment. If the fight is more about rotating quickly between hills, Fast Hands and Blood Rush may be worth more than maximum utility resistance.
Team Deathmatch and Kill Confirmed: fewer guaranteed objective interactions make Quick Fix’s elimination trigger, Ninja’s approach advantage and Fast Hands’ handling more important. Scavenger becomes more attractive if you sustain long lives rather than respawning after every trade.
Search and Destroy: a quiet approach or reliable warning has greater value when there is no immediate respawn. Ninja and High Alert compete for the same beta slot, so choose the one that addresses how your team actually takes opening duels. The need for explosives or anti-Tactical protection changes from map to map.
Ground War: larger spaces increase the value of information, survivability and counters to AI-based targeting. Cold-Blooded, Ghost and Combat Grid become more situationally relevant, but a Ground War class still has to obey whichever slot positions are present in its actual build.
Gunfight and Kill Block: do not plan around a custom three-perk setup in the shared-random-loadout Gunfight formats. The announced Kill Block Gunfight rules use the same randomized loadouts for both teams instead of the normal Create a Class system.
For an assault rifle or SMG class, Fast Hands and a movement or recovery perk usually have clear jobs. For a slower sniper, the value of a faster swap or a second primary may grow. These are role-based preferences, not evidence that particular perks change weapon damage or Weapon XP rates.
How to Test Whether a Perk Deserves Its Tier
Try two classes that differ in one perk only. Keep the same weapon, map type and objective role when possible. A class that feels better just because the lobby changed is not useful evidence. After a short set of matches, review:
- Quick Fix: did you live through more second fights after winning the first one?
- Ninja: did alternative routes lead to cleaner first engagements, not just quieter footsteps?
- Fast Hands: how often did a reload or swap otherwise cost you a duel?
- Bomb Squad / Battle Hardened: was equipment actually ending objective pushes?
- Blood Rush: did faster rotations turn into useful positioning, or just more exposed sprints?
If the benefit rarely changes a decision or fight, move that perk down for your class, regardless of its general tier. Do not compare a single strong match to several weak ones and call the difference a measured meta shift.
Get Your MW4 Loadout Ready
Perks and attachments solve different problems. A perk changes your Operator’s passive behavior; Weapon Levels unlock weapon-specific progression rewards and level-gated attachments. The MW4 Weapon Leveling guide explains that separate track, while our Best Weapons Tier List helps you choose a gun worth investing in first.
If your goal is to play the Multiplayer matches yourself, review the format of MW4 Bot Lobbies before choosing session time. If you already know which guns and attachment unlocks you want but would rather have that weapon progression completed for you, compare the MW4 Weapon Leveling options. A weapon-leveling order is not a promise to unlock all perks or change your Player Rank.
For release week, make three classes around jobs—objective entry, quiet flank and general respawn—then check their actual perk availability and slot positions on October 23. Update only the choices that changed. That is faster than rebuilding your entire class library whenever a pre-launch ranking moves a perk up or down.