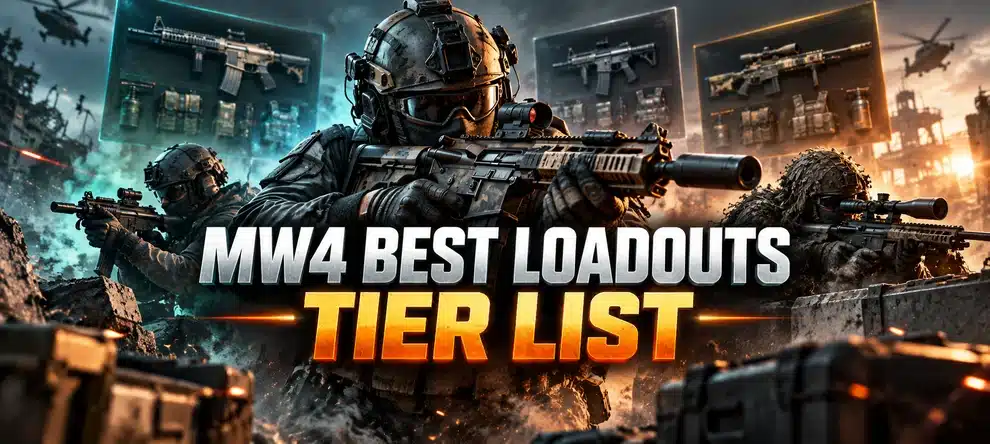
What are the best loadouts in Modern Warfare 4? For a reliable Multiplayer class, start with the M4 Balanced build. Choose ISO Nightshade Entry if you spend most of a match attacking close objectives, or X-58 Nyx Flanker if you win by reaching opponents from the side. Your best complete class is more than its primary gun: the Perk 1/2/3 combination, Tactical, Lethal, Field Upgrade and Killstreak selection all have to support the same job.
These are seven ready-to-assemble MW4 class templates based on the announced Open Beta weapons, equipment and the latest published beta rules. The full Multiplayer game is scheduled to launch on October 23, 2026. The tier rankings below are LepreStore editorial judgments about role flexibility and clarity, not measured post-launch K/D, win-rate or damage rankings. Check the live Create-a-Class screen after release before copying a beta unlock requirement.
MW4 Best Loadouts: Quick Facts
Best MW4 Loadouts at a Glance
You do not need seven different classes immediately. Pick the job you take most often and build that one first. A class with one familiar gun and complementary tools is more valuable than an S-tier weapon surrounded by equipment you never use.
| Class / tier | Best for | Primary weapon | Perk 1 / 2 / 3 | Field Upgrade |
|---|---|---|---|---|
| S — M4 Balanced | Everyday Core 6v6; mixed lanes | M4 | High Alert / Fast Hands / Scavenger | Portable Radar |
| S — ISO Entry | Close objectives and fast rotations | ISO Nightshade | High Alert / Fast Hands / Blood Rush | Trophy System |
| A — X-58 Silent Flank | Side routes and isolated targets | X-58 Nyx | Ninja / Fast Hands / Cold-Blooded | DDOS |
| A — FiNN Anchor | Holding Hardpoint or Domination lanes | FiNN LMG | High Alert / Bomb Squad / Battle Hardened | Trophy System |
| A — KG-7 Precision | Long angles and pick-focused play | KG-7 Vulcan | High Alert / Hardline / Scavenger | Portable Radar |
| B — Rezi Breacher | Very tight routes; shotgun specialist | Rezi 12 | Ninja / Fast Hands / Blood Rush | DDOS |
| B — Signal Support | Ground War; long lanes and anti-air | Signal .50 + PILA | Ghost / Hardline / Cold-Blooded | SAM Airburst Turret |
How tiers work here: S is the easiest complete class to recommend across its common use case. A is excellent for a more defined team role. B is strong when the map or situation suits it but less comfortable outside that niche. This is a Multiplayer class ranking, not another ranking of raw weapon damage. For individual guns, use the MW4 Best Weapons Tier List; for the detailed strength and slot restrictions of each passive ability, use the MW4 Best Perks Tier List.
Once you have picked a class, the main practical obstacle is often preparing its weapon. You can level attachments yourself using our Weapon Leveling guide, play a hosted selfplay session, or have the chosen weapon levels completed for you.
Play With Your Class or Get Your Weapon Levels Ready
A complete loadout needs the right gun and the attachments you have already unlocked. Choose hosted Multiplayer if you want to play the matches yourself, or weapon leveling if you want a booster to progress the selected guns. Neither option automatically grants specific camos or perk unlocks.
How MW4 Create-a-Class Works
Infinity Ward’s beta documentation lists up to 12 Custom Loadouts and places your Operator, primary weapon, secondary, melee weapon, Tactical, Lethal, one Field Upgrade, Perks and Killstreaks in the same menu. An Operator is a cosmetic choice here; it does not add a hidden combat stat. Custom classes originally opened at Player Level 4 during the beta; use the launch progression menu to verify the current unlock.
Pick 3 does not mean any three perks. It means one from each slot. For instance, Ninja and Ghost were both Perk 1 choices in the published beta layout, so they cannot occupy the same verified three-perk combination. All the templates above use one listed perk from each of the three slots. Fast Hands is Perk 2, while Blood Rush, Scavenger, Battle Hardened and Cold-Blooded are Perk 3 choices.
Some abilities or equipment in the beta were available only in Default Loadouts or at later Player Ranks. That is why the classes below include alternatives. We do not pretend that beta unlock numbers are permanent release rules. The published beta also restricted certain weapons, including Axion and Sang 9mm, to Default Loadouts and Wz. 55 Striga to a Campaign mission, so those do not appear as freely customized recommendations here.
Seven Best MW4 Class Setups: Full Builds
S Tier — M4 Balanced: Best All-Round Multiplayer Loadout
Pick this when you play a different map every match and do not want to rebuild your setup. The M4 is adaptable enough for common Core 6v6 lanes. High Alert gives information on threats outside your view, Fast Hands makes recovery between encounters easier, and Scavenger keeps the weapon supplied during extended runs. They occupy separate perk slots.
| Weapon | M4; Karit P68 secondary; Combat Knife melee |
|---|---|
| Perks | Perk 1 High Alert; Perk 2 Fast Hands; Perk 3 Scavenger |
| Equipment | Flash Grenade (Tactical) + Frag Grenade (Lethal) |
| Field Upgrade | Portable Radar for information before crossing a lane |
| Killstreak plan | UAV → Bomb Glider → Artillery Beacon, when unlocked and selectable |
| Gunsmith direction | Start with Gunny Balanced; prioritize an optic you can read, controllable recoil and comfortable ADS handling over maximum zoom |
How to play it: Stay close enough to contest the next objective while using cover to avoid fighting the entire map at once. The Frag Grenade forces a defender away from predictable cover; Portable Radar helps before you cross a central lane. Do not hold an exposed angle as though the M4 were a dedicated sniper rifle.
First-match alternative: During the beta the Han 86 was available earlier than the M4, so the Han is the natural temporary primary while you open the M4. Choose from the attachments actually available to that gun. Do not assume the October 23 unlock rank must match the beta.
S Tier — ISO Nightshade Entry: Best for Short Objective Fights
The ISO Nightshade rewards taking fights where an SMG belongs: doorways, shop interiors and immediate objective approaches. Pair it with a tool that helps start an entry and a Field Upgrade that helps keep the area after you reach it. This is not a build for challenging every long sightline across Ground War.
| Weapon | ISO Nightshade; Karit P68 secondary; Combat Knife melee |
|---|---|
| Perks | High Alert / Fast Hands / Blood Rush (slots 1 / 2 / 3) |
| Equipment | Smoke Grenade + Sticky Grenade |
| Field Upgrade | Trophy System to help hold a point against incoming projectiles |
| Killstreak plan | UAV → Bomb Glider → Combat Drone, if unlocked |
| Gunsmith direction | Gunny Short Range, then test sprint-to-fire and ADS feel; only add a larger magazine if the handling trade-off suits you |
How to play it: Smoke a dangerous crossing rather than standing inside your own cloud. Once the room is clear, deploy the Trophy System where it can intercept projectiles instead of wasting it in the open. Blood Rush was affected by beta movement experiments, so confirm the launch behavior before assuming it is essential for Tactical Sprint.
Alternative: If explosive spam ends your pushes, change Fast Hands to Bomb Squad in Perk 2. Keep the other two slots the same. For dense routes like Silkworm or inside Lotus, use our MW4 Multiplayer maps guide to choose a route before optimizing another attachment.
A Tier — X-58 Nyx Silent Flank: Best Stealth Class
Stealth is not about equipping every concealment-related perk at once. The X-58 Nyx already has integral suppression and favors controlled, quieter flanks. Ninja makes your footsteps harder to hear, and Cold-Blooded is a separate Perk 3 choice that counters several detection and automated targeting tools. Together they support the same route without illegally combining Ninja and Ghost.
| Weapon | X-58 Nyx; .50 GS secondary; Combat Knife melee |
|---|---|
| Perks | Ninja / Fast Hands / Cold-Blooded (slots 1 / 2 / 3) |
| Equipment | Snapshot Grenade + Sticky Grenade |
| Field Upgrade | DDOS to interfere with nearby electronic equipment and sensors |
| Killstreak plan | UAV → Care Package → Wheelson, where available |
| Gunsmith direction | Keep mobility and control comfortable; avoid visible laser setups if remaining unnoticed matters to your route |
How to play it: Take a side route, check the next room, secure one angle and leave before the fight turns into a prolonged open exchange. The X-58’s optional Void Apex Attachment strengthens its covert identity once the supported weapon is fully leveled, but the basic class does not require it.
Unlock fallback: Cold-Blooded was a late beta unlock. Until it is available, use Scavenger in Perk 3. You may instead replace Ninja with Ghost in Perk 1 if avoiding reconnaissance matters more than footsteps, but do not equip Ghost and Ninja together under the published beta slot rules.
A Tier — FiNN LMG Anchor: Best Defensive Objective Class
Some players need a class that wins through staying power rather than movement speed. A FiNN LMG makes sense when you can watch a route, stop repeated entries and help teammates secure the zone. Bomb Squad and Battle Hardened answer two different problems: explosive damage and tactical interference.
| Weapon | FiNN LMG; Karit P68 secondary; Combat Knife melee |
|---|---|
| Perks | High Alert / Bomb Squad / Battle Hardened (slots 1 / 2 / 3) |
| Equipment | Smoke Grenade + Proximity Mine |
| Field Upgrade | Trophy System |
| Killstreak plan | UAV → Artillery Beacon → Crossfire, as unlocked |
| Gunsmith direction | Favor control, a clear sight picture and reliable sustained fire; test Gunny Balanced before chasing ADS speed |
How to play it: Cover an approach with your LMG, keep the Mine on a plausible flank instead of directly under a teammate’s feet, and save your Trophy for the next objective contest. Rotate when the objective moves; an anchor is not a license to spend the whole match on one empty lane.
Swap for aggressive teams: If opponents are not throwing many explosives, replace Bomb Squad with Fast Hands in Perk 2 so your long reload does not become the obvious weak point. The exact map and mode matter more than a permanent tier badge.
A Tier — KG-7 Vulcan Precision: Best Dedicated Sniper Class
The KG-7 Vulcan is a bolt-action sniper with a relatively quick firing cycle for its role. Use it when the map offers sightlines worth holding and your team already has players pushing close objectives. This class is about opening precision shots and controlled repositioning, not turning a scope into an SMG.
| Weapon | KG-7 Vulcan; .50 GS secondary; Combat Knife melee |
|---|---|
| Perks | High Alert / Hardline / Scavenger (slots 1 / 2 / 3) |
| Equipment | Snapshot Grenade + Proximity Mine |
| Field Upgrade | Portable Radar |
| Killstreak plan | UAV → Care Package → Artillery Beacon, as available |
| Gunsmith direction | Gunny Long Range; stabilize the sight picture and use optics suited to your map rather than always choosing maximum magnification |
How to play it: Enter a new position knowing your exit route. A Proximity Mine is a warning or deterrent on a close approach, not a substitute for watching the radar. After one or two fights, reposition if opponents have learned your angle. Hardline helps a player who can maintain elimination streaks; if explosives constantly interrupt your hold, Bomb Squad is the direct Perk 2 alternative.
B Tier — Rezi 12 Breacher: Best Specialist Shotgun Class
A shotgun class is worth keeping in a saved slot for very short routes even when it does not belong at the top of a general weapons ranking. The Rezi 12 can solve a room-entry task that a sniper class should never attempt. The B tier reflects its narrow engagement window, not a claim that its close-range fights are weak.
| Weapon | Rezi 12; Karit P68 secondary; Combat Knife melee |
|---|---|
| Perks | Ninja / Fast Hands / Blood Rush (slots 1 / 2 / 3) |
| Equipment | Flash Grenade + Drill Charge |
| Field Upgrade | DDOS, or Riot Shield when a protected entry suits the task |
| Killstreak plan | UAV → Bomb Glider → Care Package |
| Gunsmith direction | Prioritize close handling and a usable hip-fire/ADS balance; never trade away all responsiveness for theoretical long-range damage |
How to play it: Use a Flash to start an entry, reach cover between doorways and avoid obvious long outside crossings. Drill Charge can pressure defenders behind certain surfaces. Switch to the M4 Balanced class when the match rotates to open lanes; an adaptable player uses more than one saved class.
B Tier — Signal .50 + PILA: Best Ground War Support Class
This is not our default Core 6v6 recommendation. It is a specialist large-scale class for someone who intends to hold long lanes and answer enemy air or vehicle pressure. The Signal .50 gives you a heavier precision primary; the PILA uses your secondary slot to answer targets that a sidearm cannot.
| Weapons | Signal .50 primary; PILA launcher secondary; Combat Knife melee |
|---|---|
| Perks | Ghost / Hardline / Cold-Blooded (slots 1 / 2 / 3) |
| Equipment | Smoke Grenade + Drill Charge |
| Field Upgrade | SAM Airburst Turret for aerial threats |
| Killstreak plan | UAV → Care Package → Attack Helicopter if you can earn the longer streak |
| Gunsmith direction | Gunny Long Range as a starting point; evaluate target visibility and recoil between follow-ups rather than only the highest zoom |
How to play it: Do not spend every spawn staring down a sight. Move with the squad toward a useful long lane, save the launcher for a real vehicle or aerial threat and use Smoke to reposition across exposed ground. Ghost and Cold-Blooded occupy different beta perk slots and answer different reconnaissance threats. If you still lack the late-unlock Signal .50, replace it with a more accessible rifle, keeping the PILA and anti-air utility intact.
The Signal 50 Inferno Apex is a separate max-level option announced for stronger vehicle and Killstreak damage; it is not assumed to be unlocked in this entry-level build. Large-scale sightlines also vary between Imjin Farmland, Wolves Stadium and the release map Forest. Choose the map family using our MW4 All Maps guide, not a supposed universal anti-vehicle best-in-slot list.
Which MW4 Attachments Should You Equip First?
The most useful loadout instruction is not an invented list of five attachment model names. Start with what is genuinely unlocked on your weapon. Gunny can recommend Short Range, Balanced and Long Range versions from those attachments; then use Gunsmith statistics and the Firing Range to compare them. Different weapons do not necessarily have the same compatible attachment pool or slot choices.
| Problem in your matches | Attachment priority to test | Trade-off to watch |
|---|---|---|
| You lose the first close-range shot | Rear Grip / Stock handling, or an appropriate laser when visible emissions are acceptable | Recoil, aiming stability or stealth visibility |
| You miss the second half of a mid-range burst | Muzzle / Underbarrel recoil control | ADS or movement responsiveness |
| You cannot track a target against a busy background | Clean Optic with a useful magnification | Peripheral vision and scope-in feel |
| You reload during every objective fight | Magazine options supported by the gun | Movement, aiming or reload performance |
| Your long-range shots feel inconsistent | Barrel / Ammunition ballistic options where supported | Handling and control on closer routes |
MW4’s standard attachment system shares a previously unlocked compatible part across supported weapons, reducing repeated grinds. It does not mean every part fits every weapon. On supported guns, an Apex Attachment is unlocked at maximum weapon level and does not occupy a normal Gunsmith slot. Those benefits are distinct from the weapon’s basic loadout. For exact progress-planning logic, see our weapon levels and attachments guide.
How to Adapt a Loadout to Your Multiplayer Mode
| Mode or fight | Suggested class | One change worth considering |
|---|---|---|
| Team Deathmatch / ordinary mixed 6v6 | M4 Balanced | Keep a flexible gun and avoid over-specializing field utility |
| Hardpoint under heavy explosive pressure | FiNN Anchor or ISO Entry | Bomb Squad (Perk 2), Trophy System, smoke on exposed crossings |
| Domination with short side lanes | ISO Entry or X-58 Flanker | Choose High Alert for awareness or Ninja for quieter movement; do not try to combine same-slot perks |
| Longer Core lanes / holding a power angle | KG-7 Precision | Long Range Gunsmith profile, portable intel before shifting positions |
| Very tight Core interiors | Rezi Breacher | Carry Flash and Drill Charge; switch away on exposed rotations |
| Ground War: Combat Outpost | Signal Support or M4 Balanced | PILA and SAM Airburst when aerial or vehicle targets make that worthwhile |
Do not treat a short map as automatic proof of superior Weapon XP or camo completion. Score, eliminations, weapon levels and mode-specific camo counters are different things. If your goal is a particular Multiplayer Mastery reward, consult our MW4 Mastery Camos guide and the hosted-lobby challenge checks separately.
Best MW4 Starter Loadout Before You Unlock Everything
You do not need to wait until a class matches every box above. During the beta, Create-a-Class unlocked at Player Level 4, while the Han 86 was accessible earlier than the M4. The beta offered starter Default Loadouts before custom classes were available. Those beta levels reset, so check the launch Progression screen rather than memorizing their numerical thresholds.
- Use an available Default Loadout while the custom-class menu is locked. Learn how its gun handles before changing every setting.
- When Create-a-Class opens, begin with an available assault rifle such as the Han 86 and a familiar pistol, then choose one available perk per slot.
- Equip early-access tools, such as Frag or Sticky Grenade, Flash or Smoke, and Portable Radar, as offered by your build.
- Use Gunny Balanced and adjust only the handling issue you actually notice in matches.
- As M4, Fast Hands and other desired choices unlock, replace individual pieces of the starter class rather than resetting your progress plan.
A starter setup becomes useful by being repeatable. Save a second class for a genuinely different job, not a one-attachment variation that you will forget to maintain. If you already know which guns you want but have limited time to unlock their attachment tracks, compare the MW4 Weapon Leveling options for one weapon or the full arsenal.
How to Test Your MW4 Loadout After Launch
After October 23, the class that wins in practice matters more than a pre-release S-tier label. Use the same mode, weapon and reasonable number of matches to compare a change. Instead of judging only your best highlight, write down three things: where you lost fights, whether the equipment actually helped, and whether you had the right range for the map.
| Failure you notice | What to change first | What not to change blindly |
|---|---|---|
| Outgunned while sprinting through doors | Try an SMG/shotgun entry class, better route timing, or Short Range Gunny | Every killstreak and all three perk slots at once |
| Repeated explosive deaths on Hardpoint | Bomb Squad in Perk 2 and Trophy System | Weapon tier, when the problem is utility |
| Flanks spotted before reaching the target | Check route visibility, then compare Ninja versus Ghost in Perk 1 | Illegal Ninja + Ghost pairing |
| Long-range misses with an SMG | Switch to M4 Balanced or KG-7 Precision | Infinite optics or attachment experiments to make an SMG a sniper |
| Vehicles or streaks deny Ground War progress | Add PILA and SAM Airburst; adjust for the actual threat | Assuming ordinary pistol or camo build covers anti-vehicle tasks |
| Good kills but no weapon attachments earned | Check the weapon’s actual level and available match progression separately | Assuming a high Player Rank guarantees a maxed weapon |
If aiming or movement feels wrong across all classes, that is more likely a configuration job than a weapon-build job. Our MW4 Best Settings guide covers controller, FOV, FPS and audio without turning this loadout article into a second settings manual.
These templates use the official beta’s named guns and equipment, but release changes can add new options or move unlocks. We will update this same URL when launch-build weapons, attachment inventories and perk tuning can be verified in actual matches; there is no reason to publish a competing “final meta loadouts” page just to repeat the same class roles.