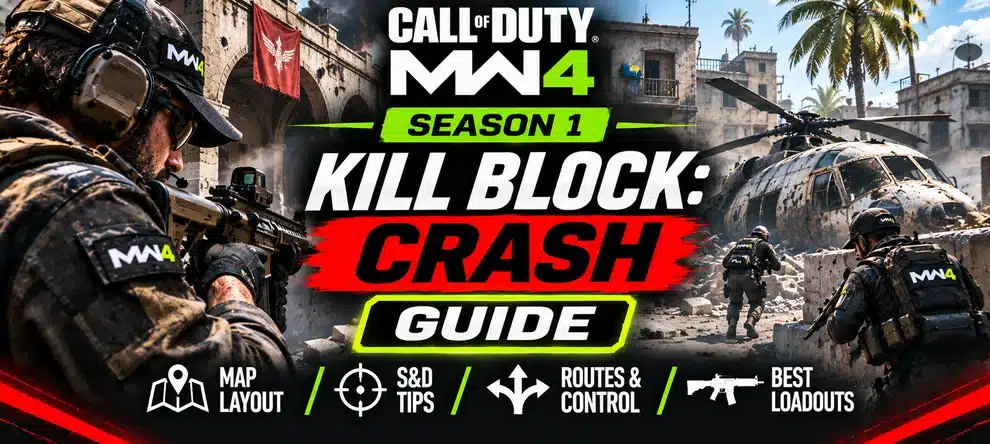
What is Kill Block: Crash in MW4 Season 1? It is a fixed three-Slab version of Kill Block with the familiar Crash area in the middle. Unlike the changing modular combinations used elsewhere in Kill Block, these three sections stay in the same arrangement between rounds. The featured Crash combination joins Modern Warfare 4 Season 1 on November 6, 2026 and is included in additional Core Multiplayer playlists, including Search and Destroy.
The main advantage is repeatability: once you learn a safe crossing, a useful angle and an alternative way into the middle, you can apply that knowledge in the next round. This guide provides a practical opening plan and mode-specific tactics. Activision has not published the names of both companion End Slabs, an exact overhead map for this Season 1 combination or its Search and Destroy bomb-site positions.
For the full set of Season 1 maps, weapons and release priorities, see the MW4 Season 1 Guide. This page stays focused on tactical decisions for the fixed Crash configuration.
MW4 Kill Block: Crash — Quick Facts
Kill Block: Crash vs Regular Kill Block
Regular Kill Block is built to surprise players with different combinations of large modules called Slabs. The Season 1 Crash variant changes that central rule: you can learn one consistent layout while still dealing with the same kind of multi-angle combat.
| Feature | Regular Kill Block | Season 1 Kill Block: Crash |
|---|---|---|
| Map structure | Three connected Slabs, normally changing configurations | Three connected Slabs in a fixed featured combination |
| Middle of the map | Depends on the selected combo | Crash is the central Slab |
| Between rounds | Gunfight configurations can change as part of the modular experience | The three featured Slabs stay static |
| Where you can play | Kill Block experiences and supported playlists | Additional Core Multiplayer playlists, including Search and Destroy |
| What to learn first | Identify which Slabs are active and adapt to their exits | Memorize the central crossings and two reliable routes out of your End Slab |
This is still Kill Block, not a separate full-size recreation of the original Crash map. A familiar building silhouette or downed helicopter does not tell you what lies beyond each Slab boundary. For the wider Multiplayer map list, see our MW4 All Maps Guide.
Which Playlist Should You Choose?
Pick the match type before deciding whether this layout is useful for your goal. A fixed map can make tactical learning easier, but it does not make every playlist or challenge work the same way.
| Your goal | Where to start | What not to assume |
|---|---|---|
| Learn the static Crash combination | Use the featured Kill Block: Crash option when it appears in the active rotation | That every Core playlist offers direct Crash selection |
| Play one-life tactical rounds | Search and Destroy is explicitly included among the announced supported modes | That bomb sites or round spawns match classic Crash exactly |
| Practice faster engagements | Select a compatible Core respawn playlist if it is available for Crash | That a particular respawn mode is guaranteed in the rotation |
| Level a weapon | Use an eligible Multiplayer match where you can reliably equip your target weapon | That Crash gives a measured fastest Weapon XP rate |
| Finish a camo condition | Match the exact weapon, mode and action shown in your camo challenge | That simply loading into Crash completes a challenge |
For general weapon progression, our MW4 Weapon Leveling Guide owns the attachment and XP rules. If you are choosing a map for certain camo tasks, use Best MW4 Maps for Weapon XP & Camo Grinding instead of treating this Crash playbook as an XP tier list.
Learn the Layout or Prepare Your Weapon
You can study Kill Block: Crash through normal Multiplayer play. If your separate goal is Weapon XP or eligible camo progress, choose a suitable session or the free progression guide; no hosted service guarantees the Crash playlist or a Search and Destroy win.
The Three-Slab Layout: Where to Look First
Activision describes Kill Block as a rectangular training space formed by two End Slabs and one Central Slab. Each section occupies roughly one third of the playable area and connects to neighboring sections. The fixed Crash centerpiece is the part to recognize first; the two adjoining End Slabs are what determine how you arrive at it.
| Area | Confirmed layout role | A useful first-round check |
|---|---|---|
| Your End Slab | One outer third; standard non-Gunfight spawns are toward the back | Find a covered route to the middle and a second exit that avoids an obvious crossfire |
| Central Crash Slab | Middle third linking both End Slabs | Check entrances on both sides and any elevated angle looking across them |
| Opposing End Slab | The third that connects beyond the center | Expect players to approach from cover, not only through the central line |
| Boundary openings | Slabs connect at defined gaps between their longitudinal sides | Watch the opening while crossing instead of assuming the wall protects every angle |
On the usual Kill Block framework, the outer perimeter uses A and B gate labels. The environment also provides slab names, room marks, arrows and numbering to help teams orient themselves. Those signs are more reliable first-match callouts than invented names for rooms you have not yet visited.
The layout is locked, but visibility is a separate question: Kill Block includes environmental effects such as rain and snow on some Slabs. Fixed geometry does not mean every gunfight will have identical visibility.
Your First-Round Plan: Five Decisions
You do not need a memorized overhead diagram to survive your opening. Make these decisions in order, then repeat the same checks on the next round to learn what is consistent.
- Orient at spawn. Identify whether you entered from the A or B side and which covered opening leads toward the middle.
- Locate the first central sightline. Before sprinting into Crash, pause at cover and scan the angle that an opponent in the central third could already hold.
- Choose a primary and backup crossing. One player can take the direct line while another covers an alternate entry, where the current Slab connections allow it.
- Check elevated exposure. Kill Block has climbable scenery and vertical positions; looking only at ground-level cover leaves you exposed to a second angle.
- Call one observation. Tell your team which opening was watched or where a push started. A short, repeatable callout builds more value than a long guess about the whole map.
After a lost opening, change one thing in the next round: swap the entry route, delay the cross, or assign a teammate to hold the sightline. Because the combination stays fixed, you can test a change against the same general geometry instead of learning a new arrangement every round.
How to Control the Central Crash Slab
The Crash section is the link between two fixed outer areas. Owning one attractive central position is not the same as controlling every entrance. Your practical job is to keep sight of a useful crossing while remaining able to respond when the fight moves toward an outer Slab.
Enter with information, not just speed
Have your first player check whether the center is watched before the rest of the squad follows. If you have a safe angle from your End Slab, use it to cover a teammate taking the shorter route. Do not stack the entire squad in one doorway where a single grenade or defender can stop the push.
Use height carefully
Kill Block can include rooftops, container tops, balconies and other climbable cover. A raised position may reveal a crossing, but it can also outline you against the background and expose you from the opposite End Slab. Take the angle for information, then move when the enemy knows where you are.
Make retreat part of the route
If the center becomes dangerous, back toward the End Slab you already understand instead of blindly pushing into the other side. A good fallback leaves you near cover and lets a teammate trade the next fight. On a fixed arrangement, learning a safe retreat is as useful as memorizing an aggressive opening.
Search and Destroy: Attacking and Defending on Crash
Activision specifically names Search and Destroy as one of the Core modes supporting the featured Crash combo. The announcement does not publish a labeled bomb-site map or fixed attacking routes. Use the actual match objectives and your spawn information; treat the following as tactical choices, not guaranteed site callouts.
On attack: clear an entry and keep the trade available
- Take the shortest useful information route first. Learn which side of the center your team can see without overcommitting the objective carrier.
- Do not all cross through the same gap. Hold one safe angle on the central entrance while a second player checks a route or elevation that the present three-Slab layout allows.
- Use the bomb marker, not nostalgia. A Crash-shaped building does not mean the bomb is in the place it occupied in a different Call of Duty game.
- Save utility for the decisive doorway. A smoke, tactical distraction or grenade is more useful when it opens a real crossing than when it is thrown as soon as the round starts.
- Protect the plant or post-plant position. Once the objective is set, keep one player watching a likely return path instead of sending everyone to hunt the last elimination.
On defense: hold information and an escape route
- Observe a central approach. Watch for a real crossing, and communicate when opponents pass the middle rather than giving a vague “all center” callout.
- Avoid double-peeking one opening. Stagger two defensive positions so one player can respond if the first angle is lost.
- Use the objective markers. Prioritize the relevant bomb site when pressure appears, not an exposed rooftop simply because it offers kills.
- Retake as a team. If attackers gain the middle, regroup on a known End Slab route and trade into the objective area instead of rushing alone.
A useful review after each round is simple: Which crossing failed, from what direction, and who could have covered it? The fixed Crash combo makes those answers reusable.
Respawn Modes: Rotate Without Overcommitting
The Season 1 announcement says the Crash combination enters a wider selection of Core Multiplayer modes. It specifically names Search and Destroy but does not list every other playlist or its exact objective placements. If your current rotation includes a respawn mode on this combo, choose the tactic that matches the scoreboard.
| If the match is… | Prioritize | Avoid |
|---|---|---|
| Team Deathmatch or a similar elimination mode | Keep a repeatable crossfire across one central entrance while watching for a respawn flank | Pushing into the far End Slab with no teammate covering your exit |
| Domination or another fixed-objective mode | Rotate toward the active marked objective and cover the approach from Crash | Assuming an old map layout determines the current objective location |
| Hardpoint or a rotating-zone mode | Learn the safest connection between two areas and arrive with teammates | Holding an obsolete position when the active point has moved |
| Any supported Core mode | Use the map and scoreboard to check what is required to win | Playing only for kills when the actual mode scores objectives |
These are mode-based principles, not claims that all the listed playlists are available on Crash at all times. The live playlist menu determines which matches can use the configuration.
Weapons and Roles That Fit the Crash Layout
A fixed layout rewards familiarity with the same angles. Build around the distance and job you actually need, not around a supposed universal best gun. The central section can invite quick crossings and longer sightlines from elevated cover, while the attached End Slabs add alternate approaches.
| Team role | Equipment priority | Main task |
|---|---|---|
| Entry player | Reliable close-to-midrange weapon, responsive handling | Clear a contested connection without leaving the team too far behind |
| Cover player | Controllable midrange primary, readable optic | Hold a crossing while a teammate moves or plants |
| Flex player | Balanced rifle or adaptable setup plus useful tactical gear | Trade a fight, change route and cover the central player |
| Longer-angle player | Stable aiming and a protected position | Check exposed vertical approaches without abandoning the objective |
You do not need every attachment or a fully leveled gun to start learning this map. If recoil control or visibility limits your ability to hold an angle, target the missing part in our weapon-leveling reference and return to Crash when the build feels comfortable.
Is Kill Block: Crash Good for XP and Camo Grinding?
It can be useful practice, but there is no verified claim that Crash is the fastest MW4 XP or camo map. A fixed set of lanes can help you repeat successful fights; it does not guarantee enough eliminations, match duration, a specific opponent type or credit for a particular challenge.
| Your progression goal | What actually determines progress |
|---|---|
| Weapon XP and attachments | Use an eligible match with the target gun and check the weapon progress counter afterward |
| Player or Soldier Rank XP | Read the Player XP result; it is a different track from Weapon XP |
| Multiplayer camo | Match its named weapon, prerequisite, required action and eligible mode |
| Search and Destroy round success | Win the round under the actual playlist rules; map knowledge alone does not award a win |
| Season 1 event reward | Follow that event’s own eligibility and reward track rather than assuming standard kills count |
The MW4 Bot Lobbies service sells timed hosted selfplay Multiplayer, not a reservation for Kill Block: Crash. Confirm which eligible progression goals and match types the service currently supports. For mode-specific camo eligibility, see our hosted-lobby camo challenge guide.
Three Matches to Learn the Fixed Combo
A short learning plan is more useful than trying to memorize every named Slab in one session. Use the same general checklist over three matches when the featured Crash configuration is available:
- Match one — map memory: identify your End Slab, the central Crash entrances, one high-risk sightline and a safe fallback. Your goal is recognition, not a high score.
- Match two — one repeatable route: choose a covered opening and repeat it with a teammate watching the other approach. Notice whether the same defensive angle beats you twice.
- Match three — objective discipline: spend less time chasing fights beyond the middle and more time holding, planting, defending or rotating as the playlist demands.
For each match, record one useful callout, one dangerous crossing and one route change. Fixed geometry means the same observations can help your next deployment, even though opponent behavior and available modes will vary.
Frequently asked questions
What is Kill Block: Crash in MW4?
Is Kill Block: Crash the full original Crash map?
Do the Slabs move between rounds on Kill Block: Crash?
Which three Slabs are used in the Season 1 Crash combo?
Can you play Search and Destroy on Kill Block: Crash?
Is Kill Block: Crash the best map for Weapon XP?
Can MW4 Bot Lobbies guarantee Kill Block: Crash matches?
Does the fixed layout mean weather never changes?
Official references: Modern Warfare 4 Season 1 announcement (October 28, 2026) confirms the fixed Crash combination and Search and Destroy inclusion. Kill Block Intel (July 15, 2026) explains the three-Slab structure, entry gates, movement and environmental effects. Individual season-specific bomb locations, the End Slab pair and measured XP rates are not specified in those announcements.