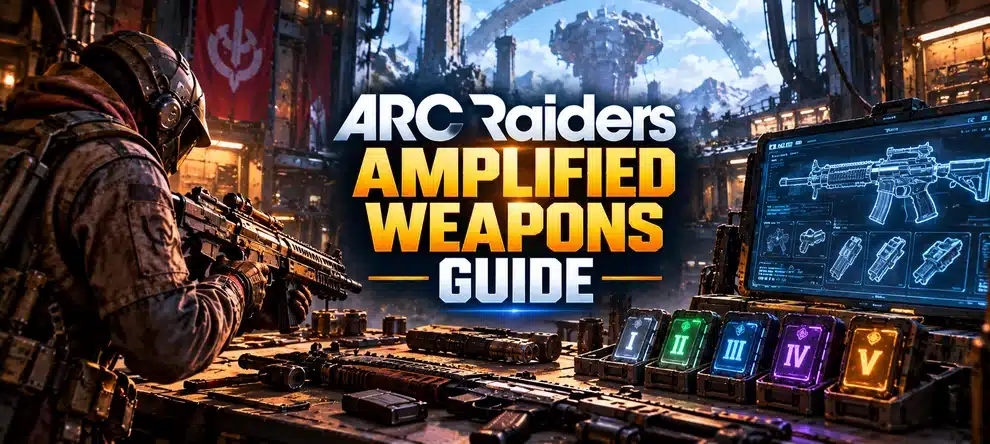
ARC Raiders Amplified Weapons are permanent fifth-tier upgrades for 15 selected guns in Frozen Trail Update 2.2. Choose the weapon and the branch first, obtain an Amplification Module of the matching rarity, and unlock any research the chosen node requires. Not every node can be combined: for example, Burletta Full-Auto closes the Burst Fire route, while Anvil X-Rounds blocks Anvil Splitter.
The best first amplification is the one you can actually use and maintain. A new firing mode can be more valuable than a small stat increase, but rare ARC parts, Research Points and Amplified Fragments all compete for your time. This guide compares the 15 weapon trees, exclusive choices, module Marks, research projects and repair risk. For a ranking of all 26 regular weapons rather than their amplified branches, use the ARC Raiders Weapon Tier List.
Which Amplified Weapon Should You Upgrade First?
| Your main goal | Path to consider | Why it helps | Check before committing |
|---|---|---|---|
| Affordable close-range PvP | Burletta – Full-Auto | A completely different firing rhythm for close fights. | More recoil, less per-shot control; the Burst Fire chain becomes unavailable. |
| Safe longer-range angles | Renegade – Scoped | Magnified aiming for careful ranged shots. | Less attractive when fights collapse into short, fast peeks. |
| Sustained mixed PvPvE | Rattler – More Reload to Drum Mag | A much larger magazine for prolonged pressure. | You must research Drum Mag and accept a recoil, ADS and repair tradeoff. |
| Steady ARC plating pressure | Anvil – X-Rounds | An explosive route geared toward tougher armor. | Choosing X-Rounds closes Anvil Splitter for this weapon. |
| Armored ARC operation | Hullcracker – Mag Reload / Incendiary Grenades | Faster reload logistics or fire pressure depending on the encounter. | An Epic module and expensive operation-oriented ammo still matter. |
| Low-cost weapon experiment | Hairpin – Semi-Auto | Changes a utility pistol into a faster-firing alternative. | Research and accuracy costs; check the October 2.1 Hairpin fix. |
These are use-case suggestions, not verified damage-per-second rankings. The detailed tree and available resources can change the best choice. A player with one Mk. V module and no spare repair parts should not use a Legendary weapon merely because its rarity is higher.
Finish the Research or Compare the DIY Path
Picking a permanent node is the first decision. Research is a separate unlock; it does not deliver a finished amplified gun.
How to Amplify a Weapon: The Unlock Order
- Unlock the Outpost. Complete the base project and progress the necessary rooms. The Frozen Trail overview explains how the project begins.
- Raise Gunsmith to IV. The fourth Gunsmith tier requires your expanded Outpost and rare components, including an Emperor Modulator. This is the bench where the Amplify action is used.
- Plan Research Station IV. Most special weapon nodes require a one-time Amplified Research project; that tab becomes usable at Research Station IV. It is a separate upgrade from Gunsmith IV.
- Prepare the compatible gun. Ordinary eligible guns need their maximum standard upgrade level before amplification. The three Legendary guns, Aphelion, Equalizer and Jupiter, follow their own no-IV-upgrade rule.
- Get the right module. Use one Amplification Module Mk. I-V that matches the weapon rarity, not your preferred perk. A module unlocks the amplified weapon tree; it does not automatically unlock every node.
- Research, then install the specific node. Complete any field objective, submit the requested ARC components and Research Points, then spend additional materials at the weapon tree. Read exclusivity warnings before purchasing a branch.
The upgrade button in the current Weapon Bench reads Amplify, replacing the older Ascend label in Update 2.2. If your UI says something different, verify that the game is updated before following a screenshot from an earlier build. Research Station IV is necessary for researching nodes; do not confuse it with the Gunsmith action that starts amplification.
Amplification Modules Mk. I-V: All 15 Compatible Guns
| Module | Rarity | Weapons | Count |
|---|---|---|---|
| Mk. I | Common | Hairpin, Kettle, Rattler | 3 |
| Mk. II | Uncommon | Burletta, Il Toro | 2 |
| Mk. III | Rare | Anvil, Canto, Osprey, Rascal, Renegade | 5 |
| Mk. IV | Epic | Bettina, Hullcracker | 2 |
| Mk. V | Legendary | Aphelion, Equalizer, Jupiter | 3 |
That is the 15-gun launch roster. The Stiletto and Bantam arrived with Frozen Trail but are not in this amplification list. Do not use the gun’s older rarity or a third-party screenshot as your final check: compare the current item color and the module tooltip. Modules are associated with the Frigate and Fallen Emperor loot routes, not ordinary Weapon Cases on every map.
If you need the dungeon key first, follow the Redirection / Emperor Payload farming guide. The Frigate Guide and Fallen Emperor Dungeon Guide explain the separate routes to the encounters that can supply modules and related materials. No specific Mark is guaranteed on a run.
All 15 Weapon Amplification Trees: Nodes and Locks
The decision below is which set of effects you want on the same gun, not which weapon ranks highest across the game. “Exclusive” means buying one path prevents the competing one; “requires” means a node must be installed first. Exact costs and tooltip figures should be rechecked in the live station before an irreversible choice.
| Weapon | Module | Available paths | Important rule | Practical decision |
|---|---|---|---|---|
| Anvil | Mk. III | X-Rounds or Anvil Splitter | Exclusive: X-Rounds blocks Splitter. | Choose explosive armor pressure or split projectiles. Old standalone Splitter tech is not a normal mod. |
| Aphelion | Mk. V | Charged Burst, Increased Burst, Bigger Mag, Incendiary Rounds | Requires: Increased Burst follows Charged Burst. Other listed nodes can stack. | A high-commitment energy build; decide whether long charge cycles fit your fights before buying extra stages. |
| Bettina | Mk. IV | Bigger Mag or Semi-Auto, then X-Rounds | Exclusive: Bigger Mag vs Semi-Auto; X-Rounds requires Semi-Auto. | Continuous fire and magazine comfort oppose a deliberate explosive semi-auto ARC branch. |
| Burletta | Mk. II | Burst Fire to Increased Burst, or Full-Auto; plus Sprint Shooting | Exclusive: Burst chain vs Full-Auto. Sprint Shooting can complement either. | Full-Auto suits aggressive close play; Burst helps players who can control timed volleys. |
| Canto | Mk. III | Carbine Conversion or Sprint Shooting; plus Incendiary Rounds | Exclusive: Carbine Conversion vs Sprint Shooting. Incendiary can accompany either. | Choose stable, aimed carbine engagements or mobile pressure, not both movement styles. |
| Equalizer | Mk. V | Ramping Damage or Anti-Weak Point; plus Bigger Mag | Exclusive: Ramping Damage vs Anti-Weak Point. Bigger Mag may stack. | Choose sustained target tracking or targeted exposed-part damage against ARC. |
| Hairpin | Mk. I | Semi-Auto to Sprint Shooting, or Tracker Rounds, or Incendiary Rounds | Exclusive: Semi-Auto, Tracker and Incendiary are competing starts; Sprint needs Semi-Auto. | Utility detection and burn are not the same role as a faster-firing sidearm. |
| Hullcracker | Mk. IV | Mag Reload and Incendiary Grenades | Compatible: both nodes may stack. | Quicker full-mag reload solves a weapon-flow problem; fire effect targets ARC control. |
| Il Toro | Mk. II | More Reload and Slug Rounds | Compatible: both may be selected. | Choose convenient shell loading and a single-projectile shotgun role rather than spread. |
| Jupiter | Mk. V | Scoped, Ergonomic Bolt, Bigger Mag | Compatible: all three nodes may stack. | A long-range specialist where scoped cycling, aiming and magazine economy matter. |
| Kettle | Mk. I | Anti-Shield and Full-Auto, or X-Rounds | Exclusive: X-Rounds blocks Anti-Shield / Full-Auto route. | Pick Raider shield pressure or the explosive ARC-oriented route. |
| Osprey | Mk. III | Ergonomic Bolt; Anti-Weak Point or Tracker Rounds | Exclusive: Anti-Weak Point vs Tracker; Ergonomic Bolt can stack. | An ARC weak-point sniper plays differently from a tagging utility rifle. |
| Rascal | Mk. III | High Velocity, Sprint Shooting, Incendiary Grenades | Compatible: listed nodes can stack. | Projectile speed, mobility and fire effects are separate tactical improvements. |
| Rattler | Mk. I | More Reload to Drum Mag; Incendiary Rounds | Requires: Drum Mag follows More Reload. Incendiary can stack. | A large magazine provides volume but the recoil, ADS and longer upkeep are real costs. |
| Renegade | Mk. III | Scoped and More Reload | Compatible: both may be chosen. | Range magnification and improved reload cadence address different weaknesses. |
The Five Permanent Choices Most Likely to Cause Regret
Burletta: Full-Auto versus Burst Fire
Full-Auto changes how the Burletta handles incoming fights; it also creates more recoil and makes careful headshot positioning less dependable. Burst Fire opens a different development chain through Increased Burst. Neither choice is automatically better against all Raiders. If you have not controlled the normal Burletta under pressure, do a few inexpensive raids first and decide whether you want more bullets continuously or timed volleys.
Anvil: X-Rounds versus Anvil Splitter
X-Rounds is an anti-armor decision; the former Anvil Splitter technology changes the projectile pattern and is not a second upgrade you can attach afterward. You also need to think about armor plates versus exposed ARC parts because Update 2.0 revised explosive damage against those two targets. Your normal Anvil does not regain its retired Tech Mod slot merely because you own the research.
Bettina: sustained magazine or semi-auto explosive route
Bettina Bigger Mag is a simple sustained-fire choice. Semi-Auto gives up that branch but enables a later X-Rounds path. Choose the latter only when you want deliberate armor hits and already plan to finish the follow-on research. Paying for Semi-Auto then abandoning its reason to exist is a common way to spend more for less.
Equalizer: continuous beam damage or precise weak-point hits
Ramping Damage rewards holding a beam on the target. Anti-Weak Point rewards a different target selection and may be less effective against some armor-plating situations. Because those paths are exclusive, first check the ARC enemies you actually farm and how safely you can keep firing. The same Queen Reactor budget can also be needed elsewhere in your late-game progression.
Hairpin and Kettle: cheap modules do not make cheap upkeep
Hairpin has utility branches as well as a more aggressive Semi-Auto path; Kettle can focus on shields or explosive rounds. Their Mk. I modules may be easier to match to an everyday kit, but every added part still ties up a repair and replacement budget. Do not purchase every available node simply because the base gun is Common.
All 15 Amplified Research Projects and What They Unlock
Research is account-level, not weapon-by-weapon. Once you complete a project such as Embedded Blast Engineering, the matching perk is unlocked for each compatible amplified weapon; you still pay to install that perk on each individual gun. Each listed Amplified Research project uses a field objective and a separate submission of 5,000 Research Points plus ARC items, according to current 2.0 research listings. The total for all 15 is 75,000 RP, but there is no need to unlock every project before choosing your first build.
The objective and parts entries below reflect the documented October research tracker; verify your live project before deploying, since map and quest fixes can change an objective. The 5,000 RP cost is in addition to the listed components for every project.
| Research project | Perk and users | Research field objective | Parts + 5,000 RP |
|---|---|---|---|
| Action Economy | Ergonomic Bolt – Jupiter, Osprey | In one raid, deal 1,000 Hairpin damage. | 8 Sentinel Firing Cores |
| Beam Resonance Tech | Ramping Damage – Equalizer | In one raid, deal 1,500 damage to Vaporizers with Equalizer. | 2 Queen Reactors |
| Burst Assembly Recovery | Burst Fire – Burletta | Destroy three Shredders using the Raider Tool. | 20 Pop Triggers |
| Compact Combustion Charges | Incendiary Grenades – Hullcracker, Rascal | Deal 3,000 damage with Blaze Grenades. | 5 Bombardier Cells |
| Embedded Blast Engineering | X-Rounds – Anvil, Bettina, Kettle | With Light Impact Grenades, deal 1,000 damage each to Fireflies, Hornets, Fireballs and Surveyors. | 5 Rocketeer Drivers |
| Extended Burst Cycles | Increased Burst – Burletta, Aphelion | Deal 10,000 damage with a Burst Fire Burletta or Charged Burst Aphelion. | 10 Comet Igniters |
| High-Voltage Exposure | Charged Burst – Aphelion | Destroy five ARC Turbines. | 5 Leaper Pulse Units |
| Magazine Geometry 101 | Drum Mag – Rattler | Deal 15,000 damage to a Bastion with Rattler and destroy it with that gun. | 5 Bastion Cells |
| Mobile-Fire Grip Fittings | Sprint Shooting – Hairpin, Burletta, Canto, Rascal | In one raid, visit seven specified Pendola Pass locations. | 20 Skulker Drivers |
| Shield Stress Testing | Anti-Shield – Kettle | Deal 700 damage to other Raiders. | 2 Matriarch Reactors |
| Solid-Core Casting Tech | Slug Rounds – Il Toro | Destroy 50 flying ARC using shotguns. | 20 Tick Pods |
| Targeted Component Trial | Anti-Weak Point – Equalizer, Osprey | Destroy 40 thrusters on flying ARC. | 20 Fireball Burners |
| Thermite-Tipped Rounds | Incendiary Rounds – Aphelion, Canto, Hairpin, Rattler | Destroy 30 Fireballs with Explosive Mines. | 5 Firefly Burners |
| Top Mounted Optics Retrofittings | Scoped – Jupiter, Renegade | In one raid, reach Pilgrim’s Peak on Blue Gate and deal 1,000 ARC damage with Osprey. | 14 Snitch Scanners |
| Trigger Reset Systems | Semi-Auto – Bettina, Hairpin | Destroy five Skulkers using a Raider Tool. | 4 Vaporizer Regulators |
For Mobile-Fire Grip Fittings, the named Pendola Pass locations are Electrical Substation, Truck Stop, Old Town, Almatera Station, Researcher Lodgings, Deep-Space Telescope and Commissary Supermarket. Extended Burst Cycles is a special trap for rushed progression: the field task requires an already compatible Burst Fire or Charged Burst weapon. Choose the project in your station before the raid and take the indicated gun or utility tool. An in-game objective may display a slightly different localized label; its active tracker is the final authority.
A Practical Research Order for Different Players
| Player | Research first | Research later | Why |
|---|---|---|---|
| Solo PvPvE with one main gun | Top Mounted Optics Retrofittings or Thermite-Tipped Rounds | Extra niche researched ammo effects | Build around a weapon and range you already use. |
| ARC armor farming with Anvil | Embedded Blast Engineering | Targeted Component Trial for other guns | Unlock the intended explosive path rather than unrelated firing modes. |
| Close-range Raider fights with Burletta | No research required for the reported Full-Auto node | Mobile-Fire Grip Fittings if choosing Sprint Shooting | Start with the actual branch, then decide whether its extras justify field tasks. |
| Mixed kit with several fire-compatible guns | Thermite-Tipped Rounds | Other shared unlocks based on use | One learned incendiary project can apply to multiple compatible weapons. |
| Heavy-ARC or dungeon specialist | Compact Combustion Charges / research tied to main anti-ARC weapon | Expensive Legendary/Queen-based branches | Avoid tying up all reactors and modules before testing a simpler clear. |
A common mistake is to research every interesting perk before deciding which gun to carry. Work in the opposite direction: choose one weapon, identify the desired exclusive branch, complete only the relevant project, and test that result. If it does not improve your raids, do not buy a second branch on another gun merely to use surplus Research Points.
Where to Get Modules, Research Items and Amplified Materials
Amplification Modules: Frigate or Fallen Emperor
The two documented high-end encounter sources are the boardable ARC Frigate and the interior of the Fallen Emperor dungeon. They are not interchangeable approaches: Frigate availability is tied to a map condition and has its own boarding and extraction risks, while Emperor entry requires the Conduit route connected to Redirection. The successful acquisition of a module is not the same thing as a successful extraction with it. Secure valuable items and leave when the run has already paid off.
Research Points: study dedicated research items
Research Points are earned by studying eligible research items brought back from Topside. The reported items include Battered Paperback, Raider Logbook, Exodus Technical Handbook, ARC Data Module and Frigate Diagnostic Node. Keep what you need for a station upgrade first, then study any surplus. A rare research item lost at the exit gives you no progress; a modest but successful extraction can be the faster path.
Rare parts: collect for the next node, not every node
Amplification nodes can require Pneumatic Actuators, Pressure Regulators, Fluted Rotor Cores, Propellant Valve Assemblies or other boss and ARC salvage. The materials may appear in encounter loot and relevant special map conditions, but do not assume the same container gives a guaranteed module or the next exact upgrade part. Open your intended node and make a short ingredient list before you deploy.
Find a Module or Keep Learning the Route
Frigate and the Fallen Emperor offer different ways to pursue amplification materials. Choose the encounter you can prepare and extract from.
Amplified Durability and Repairs: Is It Worth the Grind?
Amplifying increases a supported gun’s durability ceiling. Community-inventory tests report 200 maximum durability on amplified guns instead of the conventional 130 on tier IV copies. This larger cap is not free immortality: use still reduces durability, and repairs consume Amplified Fragments rather than ordinary materials alone. Check your current damaged state and in-game repair quote before pressing Amplify.
- Budget for repairs before committing. Fragments can come from recycling some Amplified gear, surplus modules and old Anvil Splitter parts, but salvage values and exact bills vary by weapon and node count.
- Consider what happens on death. Early live reports show looted Amplified guns arriving in heavily damaged condition. Do not assume a stolen or found amplified weapon is ready for repeated raids.
- Compare two successful runs, not peak burst. One expensive fully amplified weapon may cost more in repairs and replacements than a dependable standard alternative.
- Keep a standard backup. A normal Kettle, Anvil, Rattler or other familiar weapon can cover risky practice raids while you preserve scarce module inventory for priority objectives.
Players discussing the October launch have raised repair costs as a serious reason to avoid taking some amplified builds into every ordinary run. This is a real community concern, not a proven universal mathematical ranking. Before choosing a path, consider how often you visit Frigate or Emperor content and how many repairs your own inventory can sustain.
Common Amplification Mistakes and How to Avoid Them
- Using the wrong module Mark. Match the gun’s live rarity, not the apparent strength of the perk.
- Buying a node before reading its exclusivity. You may permanently lock the route you actually wanted.
- Expecting a completed research project to supply a ready gun. Research unlock, weapon amplification, and node installation are three different operations.
- Skipping Gunsmith IV or the Outpost level required to build it. Station prerequisites are independent from your Research Point balance.
- Ignoring the skill tree or ammo plan. A new firing mode may require different controls, ammunition reserves or movement strategy.
- Farming the wrong enemy or wrong event. Research task enemies, specific ARC component drops and Frigate module sources are not interchangeable.
- Taking an expensive gun on every warm-up raid. Test cheap routes with standard gear until you understand the repair and replacement cost.
ARC Raiders Amplified Weapons FAQ
How many weapons can be amplified in Frozen Trail 2.2?
Fifteen weapons in the October launch roster. Stiletto and Bantam are not among them. The list may grow in later updates.
Can I undo a weapon amplification?
No. The game warns that changing the weapon is permanent. Branch exclusivity also makes some later nodes unavailable, so check your plan before paying.
Do I need Research Station IV and Gunsmith IV?
Gunsmith IV handles the amplification action. Research Station IV unlocks the research projects needed by many special weapon nodes. Outpost development limits both station upgrade paths.
Where do Amplification Modules drop?
The documented specialist encounters are Frigate and Fallen Emperor. A particular Mark is not guaranteed in one run, and you must still extract with the module.
What is the difference between Mk. I and Mk. V modules?
Module Marks correspond to gun rarity. Mk. I is used for Common guns, while Mk. V is for Legendary guns. Neither Mark makes an unrelated weapon compatible.
Can I use the same Research unlock on several guns?
Yes, once the named research is completed, it is a reusable account-level perk unlock for compatible amplified weapons. Each gun still needs the node installation materials.
Can I use Full-Auto and Burst Fire on Burletta?
No. Full-Auto and the Burst Fire / Increased Burst line are mutually exclusive branches on the same Burletta.
Is the Anvil Splitter still a normal mod?
No. Frozen Trail moved the old Anvil Splitter concept to an Amplified Anvil route and removed the ordinary Anvil Tech Mod slot.
How do I get Research Points?
Find eligible Research Items on raids, extract, and use Study at the relevant station. Decide whether to keep a rare item for upgrading your station before consuming it for points.
Is a looted Amplified weapon as good as one I built myself?
Not necessarily. Early players report heavy durability loss on looted amplified guns, and repairing requires the relevant research and Amplified Fragments. Inspect the item rather than assuming it is raid-ready.
What is a sensible first amplified weapon for PvP?
Choose by role: a Full-Auto Burletta for close-range pressure or a Scoped Renegade for careful range can be reasonable. Neither is a guarantee of winning; compare your preferred map, ammo and upkeep.
What if my Amplify button still says Ascend?
Embark changed the Weapon Bench label to Amplify in Update 2.2. Restart and update your client, then verify the correct weapon, Gunsmith level and module.
Final Checklist Before You Spend Your First Module
Identify one gun, one permanent branch and one use case. Check its Mk. I-V module, Gunsmith and Research Station progress, any research tasks, available materials and expected repair bill. If any piece is uncertain, compare the live weapon tooltip and run a regular loadout until you have a clear plan. A carefully chosen first Amplified weapon can give you a meaningful new combat option; researching everything before you know what you need is an expensive distraction.
For the wider gun comparison, revisit the Weapon Tier List. If a material is blocking the Gunsmith or a perk, use the Crafting Guide or the appropriate Frigate route instead of farming generic containers without a target.