


Mastering Arc Raiders advanced crafting chains transforms you from survival-focused player to economy-dominating craftsman. The difference...
Arc Raiders’ progression system revolves entirely around the arc raiders crafting guide mechanics – understanding how to efficiently farm blueprints, manage workshop stations, and optimize material collection separates successful raiders from those grinding endlessly without advancement. Unlike traditional looter-shooters where better gear automatically drops from bosses, Arc Raiders demands STRATEFIC RESOURCE PLANNING where permanent blueprint unlocks create exponential power scaling through methodical progression. Mastering the arc raiders crafting system transforms your raids from desperate survival attempts into CALCULATED EXPEDITIONS TARGETING SPECIFIC RESOURCES needed for competitive equipment.
 Based on 4 128 reviews
  Based on 4 128 reviews
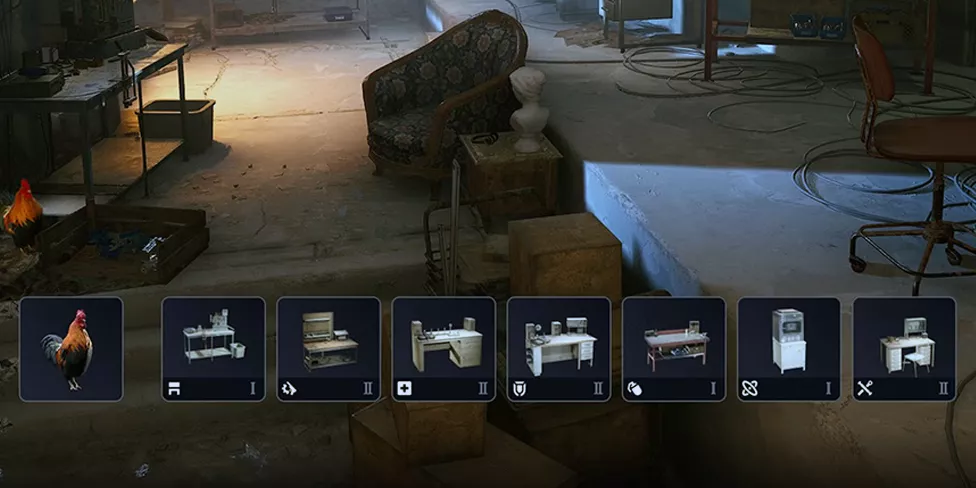
The arc raiders crafting system operates through a permanent blueprint economy – once you acquire and learn a blueprint, that recipe remains accessible indefinitely for unlimited crafting at corresponding workshop stations. This fundamental mechanic differs completely from typical loot systems where equipment drops and disappears. Your progression depends entirely on discovering and learning new recipes, building a comprehensive arsenal of crafting capabilities that compound throughout your journey.
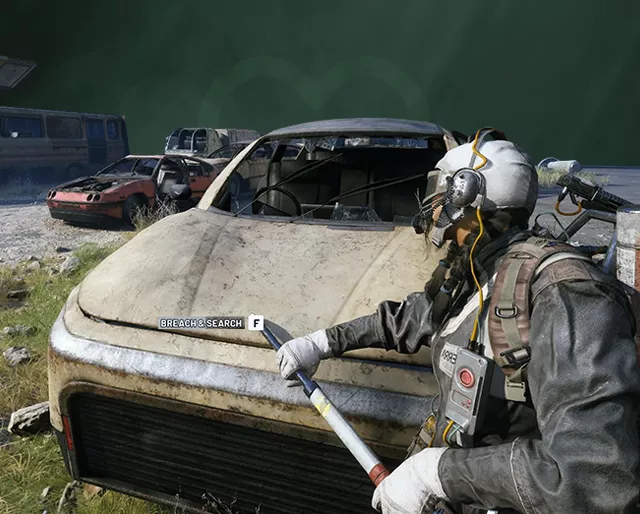
Blueprints drop from six primary sources during raids – standard containers offering baseline 8% drop rates, security lockers providing 12-18% rates in high-value areas, Elite ARC unit eliminations creating 25% chances for specific materials, Harvester Events concentrating rare drops, Buried Caches guaranteeing occasional discoveries, and Weapon Cases delivering weapon-focused recipes. Understanding which containers prioritize which blueprints enables targeted farming routes maximizing acquisition efficiency compared to random exploration hoping for lucky drops.
Workshop stations function as your crafting infrastructure – each specialization unlocks distinct item categories while upgrades expand recipe availability. The Workbench provides your foundation, offering basic ammunition and consumables. Gunsmith enables weapon crafting, Medical Lab unlocks healing items, Gear Bench facilitates augment production, Utility Station provides gadgets and tools, Explosives Station manufactures grenades, and Refiner converts materials into specialized components. Each station upgrades to maximum level 3, unlocking progressively advanced recipes matching your overall progression tier.
Skip the grind and unlock the rare Arc Raiders blueprints faster. Our material farming service handles all the tedious farming while you enjoy the action. Optimize your workshop instantly!
Effective arc raiders blueprint farming demands understanding drop rate mechanics – baseline containers offer 8% drop chances, but this multiplies substantially through specific farming techniques. Security lockers maintain 12% baseline in standard facilities, escalating to 16% in military installations and 18% in corporate executive areas. Night raids double all blueprint drop rates, creating 4x multipliers when combined with container farming in red-outlined high-value zones. Event bosses and Harvester Events concentrate rare drops further, enabling specialized farming runs targeting specific blueprint categories.
The optimal arc raiders blueprints farming strategy in 2025 involves circular routing through container clusters in red-outlined areas during night raids. These zones maintain 40% higher blueprint density than unmarked territories through concentrated loot container positioning. A single circular route covering 2-3 square kilometers typically includes 8-12 container clusters, each containing 3-5 high-value containers accessible within 5-7 minutes. This allows 45-60 minute farming runs completing multiple full circuits before extraction deadlines approach.
Security lockers demand special attention despite requiring breaching tools or keycards – their 12-18% blueprint drop rates exceed most alternatives. Military installations contain command-grade security lockers offering 20% blueprint chances, justifying the increased danger and keycard requirements. Corporate headquarters feature executive security lockers with identical 18% rates but additional Elite ARC unit encounters. Harbor facilities contain maritime supply containers with 16% rates, providing access to specialized water-based weapon blueprints unavailable elsewhere.
Strategic arc raiders workshop upgrades determine your long-term crafting efficiency – upgrading the wrong stations delays critical recipe access while neglecting essential upgrades forces reliance on inferior equipment. The optimal upgrade progression establishes Gunsmith priority first, Medical Lab second, Gear Bench third, then remaining stations based on your specific playstyle requirements.
The Gunsmith represents your highest workshop upgrade priority, unlocking weapon crafting essential for competitive loadouts. Level 1 Gunsmith enables basic weapon production, accessing common assault rifles and submachine guns. Level 2 upgrade reduces all weapon crafting costs by 25% while unlocking attachment slots for modifications. Level 3 Gunsmith provides 50% crafting time reduction and enables advanced modifications on legendary weapons, becoming the cornerstone of endgame equipment preparation.
Medical Lab upgrades provide essential survivability improvements enabling solo farming in dangerous zones. Level 1 Medical Lab enables basic bandage and stimulant crafting. Level 2 upgrades increase consumable effectiveness by 40%, dramatically extending solo endurance during extended raids. Level 3 Medical Lab unlocks advanced medical blueprints including emergency revival systems and exotic healing items.
Gear Bench enables augment crafting providing passive ability enhancements and shield modifications. Utility Station produces tactical gadgets including smoke grenades, flares, and specialized tools. Explosives Station enables grenade and mine production. Refiner station converts basic materials into specialized components essential for advanced crafting. These secondary stations deserve investment only after establishing Gunsmith and Medical Lab foundations.
Based on 4 128 reviews Based on 4 128 reviews 
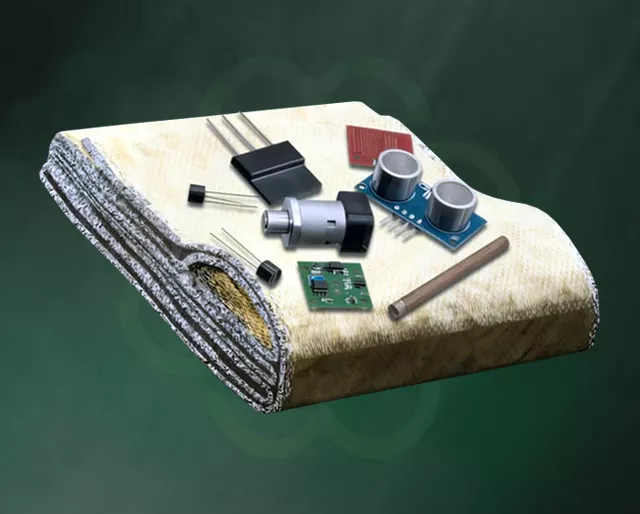
Material farming efficiency determines your crafting throughput – farming generic containers without specific targets wastes time while strategic material identification enables focused runs. Prioritize universal materials first – mechanical components from all enemies, gun parts from weapon-focused containers, fabric from clothing and residential looting, and arc powercells from ARC enemy eliminations.
Reclaimed Circuits emerge as your mid-tier progression bottleneck – most weapon blueprints require 15-60 circuits, making efficient circuit farming essential. Elite ARC units in Black Spire Zone offer 25% drop rates compared to 5% from standard enemies, creating 5x efficiency advantages justifying the danger. Queen Reactors and Exodus Modules represent ultra-rare components requiring deep Black Spire Zone farming and optimal night raid timing, enabling legendary weapon crafting but demanding elite-level preparation.
Weapon Cases REPRESENT YOUR HIGHEST-PRIORITY CONTAINER TARGET, containing weapon-specific blueprints and components with guaranteed enhanced drop rates. Cases require keycards for access, creating strategic decisions about keycard allocation during raids. Locked rooms and secured facilities almost universally contain weapon cases – prioritize these locations whenever possible. Military installations and corporate facilities maintain the highest concentration of weapon case locations.
Buried Caches OFFER CONSISTENT BUT UNPREDICTABLE BLUEPRINT DROPS – they appear randomly as disturbed soil patches throughout all maps. Excavating caches requires minimal tool investment but demands awareness to identify and access during exploration. Night raids increase buried cache discovery rates, making night farming runs valuable even for casual blueprint acquisition. Caches reset regularly, enabling multiple discovery opportunities on repeat visits to familiar farming routes.
| Location | Container Type | Blueprint Rate | Best Time | Difficulty |
|---|---|---|---|---|
| Black Spire Zone | Security Lockers | 18% | Night Raids | Extreme |
| Military Installations | Command Lockers | 20% | Night Raids | High |
| Corporate HQ | Executive Lockers | 18% | Night Raids | High |
| Harbor Facilities | Maritime Containers | 16% | Day/Night | Medium |
| Research Facilities | Lab Equipment Cases | 21% | Night Raids | High |
| Underground Metro | Metro Cache Containers | 22% | Night Raids | Medium |
| Industrial Complex | Deep Storage Units | 19% | Night Raids | High |
| Red Zone Areas | General Containers | 16% | Night Raids | Medium |
Black Spire Zone represents the ultimate farming destination for serious blueprint acquisition – Elite ARC unit density reaches maximum levels alongside unprecedented container concentrations. Security lockers maintain 18% blueprint rates while command-grade lockers offer 20% chances. Night raids increase rare blueprint multipliers by 4x, transforming Black Spire into the single most efficient farming location when timing aligns with night raid events.
The optimal Black Spire farming approach balances container looting (60% time allocation) against Elite ARC unit eliminations (40% time allocation). This balance maximizes both blueprint acquisition and Reclaimed Circuit drops simultaneously. Equipment rating minimums of 850 apply – arrive underprepared and Elite ARC units eliminate you before extracting with collected blueprints. Energy weapon specialization becomes mandatory for efficient ARC unit elimination.
Based on 4 128 reviews Based on 4 128 reviews Security lockers exist in five distinct categories – standard lockers (12% blueprint rate), reinforced lockers (16%), command-grade lockers (20%), executive lockers (18%), and corporate restricted lockers (22%). Efficient routing prioritizes command-grade and corporate restricted categories while avoiding standard lockers unless traversing naturally past them. Military installations concentrate command-grade lockers while corporate facilities feature the highest concentration of executive and restricted categories.
Keycard acquisition through Elite ARC Commander elimination enables access to restricted zones – a single 15-minute farming session targeting commanders yields 2-3 keycards, sufficient for multiple high-value container access. Strategic keycard allocation determines farming efficiency – spend cards accessing premium locker categories rather than conserving them for future raids. The 2025 meta established that keycard utilization provides greater farming throughput than accumulation for future use.
Linear farming routes create backtracking inefficiency – walking through container clusters then retracing steps wastes 30% of farming time. Circular routes eliminate backtracking by connecting clusters in continuous loops, improving efficiency by 40% compared to linear approaches. Optimal circular routes incorporate 8-12 container clusters covering 2-3 square kilometers, accessible within 45-60 minute farming windows.
By the way, route planning effectiveness usually measures clusters per minute – optimal circular routes typically achieve 0.15-0.20 clusters per minute while backtracking routes only achieve 0.08-0.12. Incorporating zipline networks when available provides rapid movement between clusters without ground-level risk exposure. Map knowledge becomes essential – experience with specific locations enables route optimization reducing travel time while maintaining container access.
Learning blueprints provides permanent crafting capabilities – prioritize recipes enabling competitive loadout assembly over duplicate copies. Essential weapon blueprints should be learned immediately upon discovery. Utility blueprints enhancing survival capabilities deserve early learning. Duplicate blueprints can be sold for 5,000 coins each only after securing essential workshop upgrades, as the long-term crafting value exceeds one-time coin gains.
The 2025 meta established a clear blueprint learning hierarchy – weapon blueprints deserve priority as foundation equipment, medical blueprints provide survival enablement, utility blueprints offer tactical advantages, then cosmetic or specialized blueprints. This prioritization ensures your learned blueprints directly enable raid success rather than providing situational benefits.
What’s the fastest way to farm blueprints in Arc Raiders?
Black Spire Zone night raids provide 4x blueprint multipliers through security locker farming (18% base rate) combined with Elite ARC unit elimination (25% circuit drops), yielding 3-5 rare blueprints per 45-60 minute circular route.
Are high-value zones worth the death risk?
Yes – the Black Spire Zone’s 8-18% blueprint drop rates dramatically exceed other locations despite increased Elite ARC difficulty; risk-reward favors aggressive farming when equipped with proper energy weapons and adequate supplies.
How do night raids affect blueprint farming efficiency?
Night raids double blueprint drop rates and increase Elite ARC spawn rates by 50%, making them essential for serious farming; the 4x multiplier effect on rare blueprints justifies timing farming sessions around night raid windows.
Should I sell duplicate blueprints or keep them?
Learn duplicates only if enabling new capabilities; sell excess blueprints for 5,000 coins each after completing essential workshop upgrades like Gunsmith level 2, as long-term crafting value exceeds one-time currency gains.
What blueprint should I prioritize learning first?
Prioritize weapon blueprints enabling competitive loadouts (Tempest, Anvil, Bobcat), then medical blueprints for survival (Bandages, Shield Rechargers), then utility blueprints offering tactical advantages; cosmetic blueprints deserve lowest priority.
How many keycards do I need per farming run?
Carry 2-3 keycards per run targeting command-grade security lockers; allocate cards to premium container access rather than conserving them, as utilization provides greater farming efficiency than accumulation.
Mastering arc raiders crafting guide mechanics transforms your progression from desperate scrambling into strategic resource planning – blueprint acquisition determines your equipment tier, workshop upgrades enable crafting efficiency, and material farming routes maximize resource collection. The 2025 meta established that circular night raid farming through security locker clusters provides the optimal balance of blueprint acquisition, material collection, and risk management.
Commit to consistent workshop upgrade progression following Gunsmith > Medical Lab > secondary stations prioritization. Invest heavily in Black Spire Zone night farming once equipment reaches 850+ rating threshold. Plan circular farming routes through container clusters minimizing backtracking. Learn essential weapon and medical blueprints immediately upon discovery. Accept calculated risks targeting high-value zones while maintaining strict extraction deadlines preventing catastrophic losses. These foundational principles enable sustainable progression toward endgame equipment mastery.
Your arc raiders workshop upgrades represent permanent infrastructure investments multiplying every future raid efficiency. Your learned blueprints enable unlimited crafting creating exponential power scaling. Your farming route optimization determines material collection throughput. Master these systems systematically and extraction success rates inevitably exceed 70%, enabling consistent loot management and competitive loadout assembly. Now gear up strategically, execute optimized routes methodically, and watch your crafting arsenal transform Arc Raiders from challenging survival simulator into conquered conquest.