
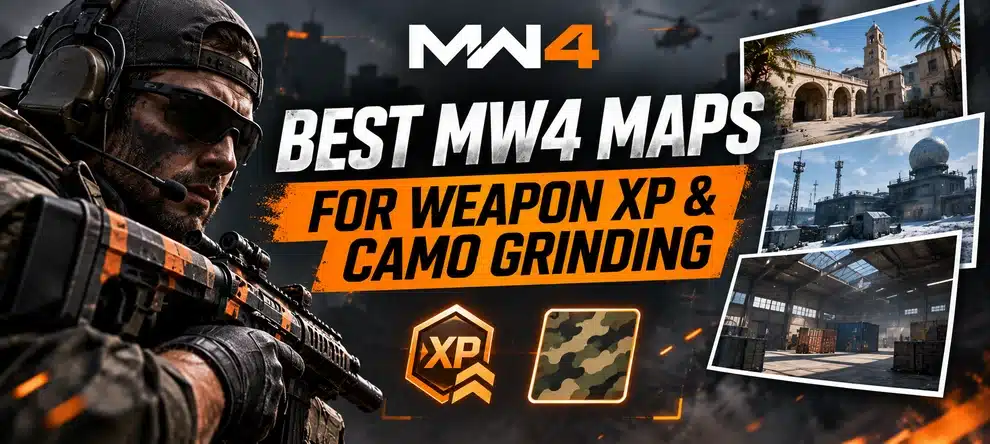
The best MW4 map for weapon XP and camo grinding depends on your current challenge. Start with Shipment when you need frequent close-range fights, point-blank eliminations or a steady stream of attempts with a shotgun, SMG or melee weapon. Choose Silkworm or Transit 213 for controlled short-to-medium fights, Rooftops or Lithium for precision angles, and Imjin Farmland or Forest when your setup benefits from Ground War sightlines and vehicles. There is no single map that is best for every gun or camo step.
Shipment 24/7 is a confirmed MW4 Multiplayer playlist, and the map is already part of the game. However, playlists rotate, challenge prerequisites matter, and Weapon XP earn rates can change. The picks below reflect map fit, confirmed layouts and mode rules; they are not measured XP-per-hour rankings. First identify what the game is asking you to do, then choose the map that gives you repeatable opportunities to do it.
MW4 Map Grinding at a Glance
Best MW4 Maps by Weapon XP and Camo Challenge
Use the actual challenge text as your filter. “Get kills” and “get longshot kills” may be on the same weapon, but they call for different routes. The recommended maps below are starting points, not guaranteed queue selections or fixed XP rankings.
| Your current goal | Start with | Why it fits | When to switch |
|---|---|---|---|
| Raise early Weapon Levels quickly | Shipment / 6v6 respawn | Short walks back into combat and many chances to use your chosen gun. | If repeated deaths make your weapon XP per minute worse than standard 6v6. |
| Point-blank or close-range kills | Shipment; Silkworm | Containers, narrow shops and alleys produce short-distance encounters. | If the challenge requires a different weapon type or map geometry. |
| Shotgun, SMG or melee practice | Shipment; Silkworm | Close fights reward fast handling, short routes and cover transitions. | If you cannot approach safely or need a longer-range objective. |
| Headshots, mounted kills or controlled precision | Lithium; Rooftops | Refinery routes and rooftop sightlines let you set up more deliberate fights. | If you lack repeatable, safe angles or the target distance is not registering. |
| Longshots or sniper setup | Rooftops; Imjin Farmland | Elevated and open lines give more room to meet a distance-based condition. | If fight density is too low or the game does not award the required longshot tag. |
| AR or marksman rifle steady fights | Transit 213; Lithium; Lotus | Mixed cover and mid-range lanes let you hold a useful engagement distance. | If the route produces too much downtime or frequent close-range ambushes. |
| Launchers and vehicle-related conditions | Ground War: Imjin Farmland or Forest | Large modes feature vehicles and clear travel lanes; check the specific launcher challenge. | If the task actually requires player kills, equipment or another target type. |
| Repeated kills-per-match Mastery tasks | Shipment or a comfortable Core respawn map | Several engagements per match help you reach a consistent match threshold. | If you need no-damage or no-death streaks and the chaos is costing progress. |
| No-damage or no-death streaks | Lithium; Rooftops; Lotus | Use controlled approach routes and defensible positions instead of blind spawn rushes. | If enemies constantly break your line or force exposed rotations. |
Fast rule: Shipment is a strong first pick for action density. It is not the automatic choice for precision, survival-based Mastery or long-distance tasks. The exact requirements live in the MW4 Mastery Camos guide; this article helps you choose the environment after you know which counter you need.
Play Yourself or Finish Your Weapon Levels
Now that you have chosen a map and goal, pick the way you want to progress. These services handle different parts of the grind, and neither promises a specific public-playlist map.
Shipment: Best First Stop for Close-Range Grinding
Shipment is the most obvious opening pick when your task rewards frequent encounters rather than long-distance control. Its compact container layout cuts down travel between fights, and the dedicated Shipment 24/7 playlist makes it easier to focus on a single map whenever that playlist is offered. This is why it suits basic weapon-level sessions, fast-firing guns, point-blank work and many short-range Special Camo challenges.
Do not let the tiny map decide your entire grind. You can spend more time respawning than using your target weapon if you sprint into exposed lanes every life. Move through the containers, reload in cover and keep a close-range secondary only for survival: the weapon you actually want to level should stay your main source of progress.
- Best fit: SMGs, shotguns, melee, short-range doubles, point-blank eliminations and straightforward kills-per-match tasks.
- Less reliable: distance-gated longshots, slow sniper setups, protected streaks and any challenge that requires a calm firing position.
- Loadout adjustment: favor quick handling and enough ammo to keep your chosen gun active; check the Weapon Leveling guide for attachment unlock mechanics.
- Playlist caveat: Shipment 24/7 is a rotating mode. If it disappears from your menu, select the closest 6v6 respawn alternative by challenge type rather than waiting for the same card.
Shipment is not a guaranteed camo shortcut. For Gold or other Completionist challenges, finish the unlock prerequisites first. A high-kill game cannot award a challenge that is still locked.
Best Alternatives to Shipment for Close and Mid-Range Weapon XP
Silkworm: Small-Lane Pressure Without Shipment Chaos
Silkworm is a dense shopping district with alley access, storefronts and a central subway entrance. Its connected lanes give SMGs and mobile assault rifles frequent contact without putting every player in one tiny container yard. Take one short route, learn where enemies cross it, and avoid sprinting into the center every life. The aim is repeatable use of one gun, not the highest possible number of firefights.
Transit 213: Controlled Engagements Around the Buses
Transit 213 is a bus depot bordered by a repair shop, gas station and surrounding buildings. The buses interrupt long lines of sight and create a useful mix of short and medium fighting. It is a practical alternative for ARs, fast marksman rifles and challenges that require several kills in one match. Move from one protected bus lane to another instead of wandering across the open central lot.
Lotus: Mid-Range Fights and Flexible Route Choices
Lotus combines village streets, a market, boathouse and residential spaces. Use the boathouse and the market routes to shift between short and medium engagements. It is a balanced option when Shipment is too chaotic but a full Ground War deployment leaves too much downtime. If the current weapon needs a specific distance or stance, choose the lane that naturally supports it before trying to force the challenge.
Best MW4 Maps for Longshots, Headshots and Sniper Challenges
Rooftops: Use Elevation and Stable Sightlines
Rooftops uses the snow-covered roofs and indoor utility spaces of Hotel Times West. Greenhouse, HVAC platforms, skylights and rooftop connections create overlapping angles. It is a reasonable first test for snipers, marksman rifles, ADS and precision tasks. Pick one sightline and watch its likely flank rather than shifting positions after every missed shot. A long-looking angle only counts as a longshot when the game registers the required distance.
Lithium: Work the Refinery Lanes and Garage Doors
Lithium has industrial sightlines and interactive garage shutters. It is useful for mounted, headshot or mid-range work because the doors and processing structures can break up a long lane into manageable portions. Do not assume every shutter position or window satisfies a longshot requirement; check the counter and adjust. The moving doors also create close-range threats that make static camping unreliable.
Ground War: Imjin Farmland, Forest and Wolves Stadium
When you genuinely need open space, vehicle interactions or extended firing distances, use Imjin Farmland for fields and stronghold approaches, Forest for hillsides and roads, and Wolves Stadium for a mix of urban levels and longer sightlines. Ground War is not automatically the fastest source of Weapon XP: travel, objectives, vehicle time and respawn locations can reduce how much time you spend firing your chosen gun. Make the decision based on your measured progress, not the lobby size alone.
For the Season 1 map pool, Shoot House offers another medium-sized three-lane option when it is included in your playlist. Its Junkyard, Center and Containers lanes provide a useful contrast to Shipment, but it should not be treated as a guaranteed longshot or XP multiplier. See the MW4 Season 1 Guide for the wider map and event lineup.
Best MW4 Modes for Grinding: Map and Playlist Matter Together
The same map can play very differently in Team Deathmatch and Hardpoint. Choose a mode where you can repeatedly use your intended weapon and satisfy the objective. Mode names alone do not determine Weapon XP; a game update has already adjusted XP earn rates across several Multiplayer modes, without supplying a permanent map-by-map XP table.
| Mode or playlist | Why you might choose it | What can go wrong |
|---|---|---|
| Shipment 24/7 | Focused small-map 6v6 action when it is on the active rotation. | Respawn chaos and short lanes may hurt precision or survival challenges. |
| Hardpoint | A rotating objective concentrates fights around successive locations. | A poor rotation can leave you exposed or away from your intended gun range. |
| Domination | Fixed objectives make the main engagement lanes easier to learn. | You can lose time holding positions without getting qualifying weapon kills. |
| Kill Confirmed | Tags draw players into active lanes and reward mobile movement. | Chasing tags can pull you into a distance that does not fit the task. |
| Team Deathmatch | Straightforward respawn mode for testing a chosen weapon consistently. | A low-contact match can finish before your target progression advances much. |
| Combat Outpost (Ground War) | Large-scale objectives, vehicles and longer approaches. | Distance between fights and non-weapon activity can depress Weapon XP per minute. |
| Gunfight / Kill Block Gunfight variants | Good for short tactical training and adaptation to supplied loadouts. | Assigned or changing weapons make it a poor default for one specific target gun. |
| DMZ deployments | Shared weapon levels may advance while pursuing extraction-mode objectives. | Separate DMZ requirements and deployment time are not identical to Multiplayer camo progress. |
If your challenge says “Multiplayer”, do not assume a DMZ AI elimination satisfies the same counter. Shared gun levels and shared Special Camo rewards do not make the mode-specific Mastery paths interchangeable. Likewise, a private practice match is not a substitute for an eligible progression playlist unless its results are confirmed in the game.
How MW4 Camo Stages Change Your Best Map
A common mistake is to pick a map first and then wonder why the camo is not moving. MW4 uses a staged system, so the correct order is to inspect the weapon level and current unlocked challenge, then select the location.
- Military Camos: There are eight for each gun, unlocked by reaching weapon-level milestones. For this stage, a map where you can consistently use the gun is generally more useful than an exotic challenge-specific location.
- Special Camos: Each gun has three weapon-specific tasks that unlock at set weapon levels. Requirements can include mounted kills, longshots, headshots and double kills. Read the exact requirement; the right map depends on that task.
- Gold and higher Completionist stages: Gold does not become available until the weapon has its Military and Special Camos. Platinum and Harmonic Break introduce additional class and challenge gates. Use the MW4 Divergence Camo Guide to follow the full route.
- Mastery Camos: Multiplayer, DMZ and Warzone have distinct Mastery objectives. For a no-death or no-damage streak, a calmer map may be more productive than Shipment. For DMZ-only and Warzone-only tasks, a Multiplayer map cannot replace the required mode.
For example, a weapon can gain levels on Shipment while its later Special Camo needs a longer shot. That is not wasted progress. It simply means the map that is useful for Military Camos may not be the map you should play for the next active Special Camo.
Best Map Choice for Each Weapon Type
| Weapon class | Start here | Adjust the plan when |
|---|---|---|
| SMGs | Shipment, Silkworm | You need a distance-based challenge or find yourself losing every close exchange. |
| Shotguns | Shipment, Silkworm | The task asks for a particular stance, precision or a restricted number of kills per life. |
| Assault rifles | Transit 213, Lithium, Lotus | The build is tuned for extreme close range or long sightlines. |
| LMGs | Lithium, Rooftops, Ground War objectives | Slow handling makes short-distance respawn loops inefficient. |
| Marksman rifles | Rooftops, Lithium, Transit 213 | You need faster close-range contacts or the range tag does not appear. |
| Sniper rifles | Rooftops, Imjin Farmland, Forest | Large maps create long periods without a valid target. |
| Pistols | Shipment, Silkworm | A headshot or ranged challenge requires a more deliberate angle. |
| Launchers | Ground War for vehicle-related tasks; Shipment for eligible close-range targets | The actual challenge requires another target type; avoid inferring that all streaks or vehicle hits count. |
| Melee | Shipment, Silkworm | You cannot reach targets safely or need a mode-specific non-Multiplayer objective. |
This is an editorial starting grid based on weapon handling and published map geometry, not a measured weapon win-rate ranking. For gunsmith builds and attachment unlock decisions, use the dedicated Weapon Leveling guide and the complete MW4 map reference.
Measure Real Weapon XP Instead of Trusting a Fixed Tier List
If two maps both feel good, compare the result on your own account. Recent Multiplayer patches adjusted XP earn rates, so any universal “XP per hour” number can become unreliable even when the maps stay the same. Your test should use the same target gun and the same measurement method for each session.
- Record the target weapon level and XP position. Use the weapon Progression screen; Soldier Rank and general match score are not substitutes.
- Play a short, consistent set. Use three ordinary matches or a repeatable timed block. Keep the same weapon, token status and core playstyle where possible.
- Count total elapsed time. Include matchmaking, loading, menus and post-match downtime when deciding how much your actual evening progressed.
- Compare progress, not only kills. Divide the weapon XP gained by elapsed minutes. If your interface only shows level progress, compare milestones over similar windows rather than inventing exact XP.
- Make the switch. If Shipment produces more deaths and less target-gun progress than Lithium, prefer Lithium for that weapon even if another player swears Shipment is fastest.
A simple session log needs only five fields: map and mode, target gun, starting and ending progress, elapsed time, and active camo challenge. If a Double Weapon XP bonus is active during one test but not the other, the results are not a fair comparison. Remember that completing a camo challenge is a separate success metric: a slower XP match can still be the best match for a hard-to-finish requirement.
When a Map Is the Wrong Tool: Common Grinding Problems
- Longshots are not registering on Shipment: change to Rooftops, Lithium or an open Ground War route, then confirm the game awards the correct range marker.
- Close-range kills take too long on a large map: return to Silkworm or Shipment rather than spending half the match crossing open terrain.
- You need repeated no-damage or no-death streaks: leave chaotic spawns and use controlled angles with safer exits. Kills per minute are not the priority.
- The camo is still locked despite many kills: inspect required Military, Special, Gold and class-based unlock gates before blaming the map.
- The progress bar does not move in a hosted session: check mode eligibility and the specific task, not just total kills. See MW4 Camo Challenges Not Tracking for the full diagnosis.
- Gunfight gives you the wrong weapon: use a Core playlist where you can equip and use the chosen gun consistently.
- A seasonal map is not in your playlist: choose a map with similar sightlines and contact distance instead of assuming the map has a permanent 24/7 queue.
Some camo tracking and unlock display problems have been corrected by official patches. That is another reason to check the current weapon Camo and Progression menus instead of interpreting an old screenshot or a general kill tally as proof of a bug.
DIY Farming vs Hosted Bot Lobbies vs Weapon Leveling Boost
The fastest practical route depends on whether you want to play yourself or simply reach a defined weapon-level target. These are separate customer choices, not different names for the same purchase.
| Route | You control the match? | Best reason to choose it |
|---|---|---|
| Normal Multiplayer / DMZ | Yes | You want to test maps, learn routes and earn the exact progress yourself. |
| MW4 Bot Lobbies (hosted self-play) | Yes, in the hosted Multiplayer session | You want booked self-play time for eligible gun XP or camo tasks; check the current session format and whether your challenge counts. |
| MW4 Weapon Leveling (piloted) | No, the agreed leveling scope is performed for you | You mainly want selected guns or the base roster leveled for attachments and max-weapon-level rewards. |
| MW4 Camo Services | Depends on the chosen camo service | You need a completed specific camo target rather than a guaranteed result from a hosted XP session. |
The MW4 Bot Lobbies guide explains hosted play in more detail. Neither a public playlist nor a hosted session guarantees that every camo objective can be completed on any map. Match the service to the player goal, weapon and mode before choosing.
A Simple MW4 Map-Grinding Session Plan
- Pick one weapon and one unlocked objective. Write down whether you need Weapon XP, short-range kills, precision, streaks or a mode-specific reward.
- Choose the map by the objective. Start at Shipment for close-range volume, Transit 213 or Silkworm for controlled engagements, and Rooftops or Ground War for longer angles.
- Play a short block and check the result. Keep the same gun in use, then compare actual weapon progress and challenge counter movement.
- Switch without losing the bigger goal. Finish what the current map does well, then move to the map or mode that meets the next gate. Use the Orion Reforged route when you enter Multiplayer Mastery.
The right map is the one that lets you complete the current task consistently. Shipment is a powerful starting point, but the full grind becomes easier when you are willing to change maps as the challenge changes. For the official map descriptions and mode rules, see the MW4 Multiplayer Maps and Modes guide and the MW4 patch notes.


