


Mastering Arc Raiders advanced crafting chains transforms you from survival-focused player to economy-dominating craftsman. The difference...
Understanding Arc Raiders map navigation transforms random exploration into calculated resource acquisition – knowing where high-value loot spawns, which extraction points offer safety, and how to route efficiently through dangerous zones separates successful raiders from those perpetually losing gear. The ARC RAIDERS MAP GUIDE knowledge determines whether you extract with full pockets or respawn empty-handed in Speranza. Five distinct playable areas demand specialized approaches – Dam Battlegrounds emphasizes basic materials, Buried City concentrates residential loot, Spaceport provides weapon-focused containers, Blue Gate features puzzle-based rewards, and Stella Montis delivers the highest-tier loot alongside extreme PvP intensity.
Master every location from Dam Battlegrounds to Spaceport. Get expert navigation coaching and guaranteed access to the best loot routes. Book an Arc Raiders boost and discover hidden extraction points that guarantee your escape. Level up your map knowledge today!
Arc Raiders features five distinct playable maps, each specializing in specific loot categories and presenting unique navigational challenges. Dam Battlegrounds serves as the beginner-friendly introduction with moderate ARC density and accessible container distribution. Buried City emphasizes close-quarters urban combat with residential loot concentration. Spaceport provides industrial military-grade equipment within expansive warehouse complexes. Blue Gate introduces puzzle mechanics rewarding exploration with premium loot. Stella Montis represents endgame territory featuring multi-level underground facilities with extreme player competition.
Each map spans approximately 2-4 square kilometers of explorable terrain divided into named Points of Interest (POIs). Red-outlined zones indicate high-value areas with increased container density and blueprint drop rates. Yellow zones represent moderate-risk moderate-reward territories. Unmarked areas contain baseline loot suitable for quick material gathering. Understanding these zone classifications enables strategic route planning maximizing reward-versus-risk calculations during time-limited 30-MINUTE raids.
The ARC RAIDERS INTERACTIVE MAP community tools provide real-time POI tracking, but experienced raiders internalize key locations enabling rapid decision-making without constant map consultation. Learning landmark recognition – distinctive buildings, terrain features, and structural layouts – accelerates navigation while reducing vulnerability during map checks.
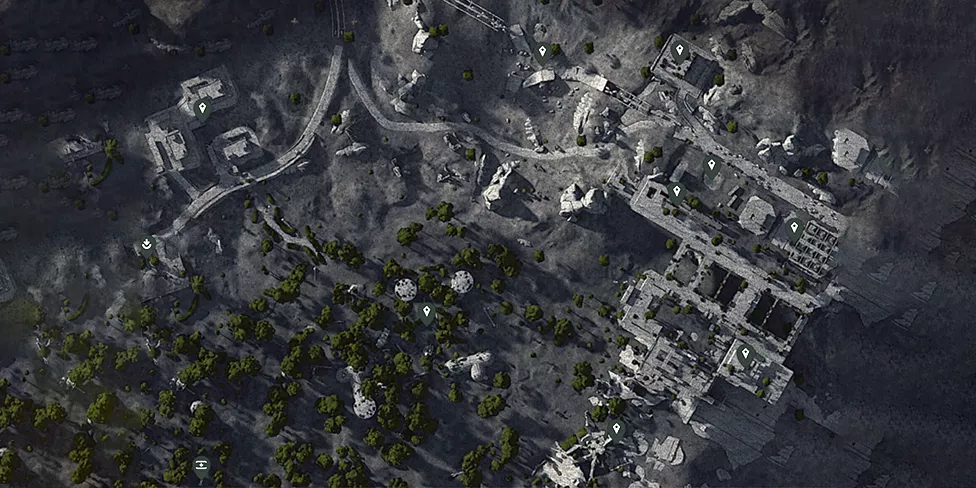
Dam Battlegrounds establishes itself as the optimal starting location for new raiders and material farmers targeting basic crafting components. The map specializes in Batteries, Arc Alloy, Wires, and Voltage Converters – essential materials for workshop upgrades and consumable crafting. Lower overall player competition compared to advanced maps creates safer farming environments for skill development.
| Location | Primary Loot | Container Density | PvP Risk | Best For |
|---|---|---|---|---|
| Electrical Substations | Batteries, Wires | High | Low | Solo farming |
| Research & Administration | Attachments, Blueprints | Very High | High | Squad runs |
| Industrial Zone | Arc Alloy, Processors | Medium | Medium | Material gathering |
| Ruby Residence | Keycards, Random loot | Medium | Low | Keycard farming |
 Based on 4 128 reviews
  Based on 4 128 reviews
 Electrical Substations scatter across Dam Battlegrounds, offering concentrated battery spawns with minimal player traffic. These locations typically contain 8-12 containers including wall-mounted electrical boxes and floor storage units. Battery drop rates exceed 40% per container, enabling 15-20 battery acquisition during focused 10-MINUTE farming sessions. New raiders prioritize this location for workshop upgrade material accumulation without significant PvP exposure.
Research & Administration represents Dam Battlegrounds’ premium loot zone, concentrating weapon attachments, blueprints, and rare materials within a compact multi-story facility. Red locker spawns provide Epic item chances while security breaches deliver guaranteed high-value containers. Player traffic intensifies here – expect squad encounters and aggressive competition. Arrive equipped with competitive loadouts or avoid this location entirely during early progression phases.
Arc Alloy farming focuses on Probe destruction and ARC unit elimination rather than container looting. Probes spawn throughout Dam Battlegrounds, particularly near Industrial Zone perimeter. Each Probe destruction yields 1-2 Arc Alloy with 8 Alloy combining into Arc Circuitry required for Refiner Workshop upgrades. Solo farmers leverage stealth approaches, destroying Probes without triggering reinforcement alerts.
Buried City transforms extraction gameplay into close-quarters urban warfare through narrow streets, multi-story buildings, and underground metro systems. The map concentrates residential loot including Old World items, mixtapes, and consumable materials while providing exceptional blueprint farming during night raids. Metro station extraction points create tactical bottlenecks, requiring careful timing and positioning compared to open-area elevators on other maps.
| Location | Primary Loot | Container Density | PvP Risk | Best For |
|---|---|---|---|---|
| Piazza Roma | Weapons, Blueprints | Very High | Very High | Squad PvP |
| Piazza Arbusto | Attachments, Epic loot | Very High | High | Night raids |
| Hospital | Medical items, Keycards | High | Very High | Camper hotspot |
| Santa Maria Houses | Weapon crates, Safes | Medium | Medium | Stealth looting |
| Buried Properties | Residential loot, Coins | High | Medium | Material farming |
Buried City transforms extraction gameplay into close-quarters urban warfare through narrow streets, multi-story buildings, and underground metro systems. The map concentrates residential loot including Old World items, mixtapes, and consumable materials while providing exceptional blueprint farming during night raids. Metro station extraction points create tactical bottlenecks, requiring careful timing and positioning compared to open-area elevators on other maps.
Piazza Roma and Piazza Arbusto establish themselves as Buried City’s premium ARC RAIDERS LOOT LOCATIONS, featuring multi-level buildings packed with security lockers and weapon crates. Buildings offer multiple breach points – rooftop access, ground-level doors, and underground tunnels – enabling tactical approaches avoiding predictable entry points. Night raids increase blueprint drop rates to 16-18% in these zones, making them essential farming destinations for serious progression.
The corner area between Buried Properties and Piazza Arbusto remains surprisingly underlooted despite high container density and blueprint chances. This small zone contains 6-8 security lockers with reduced player traffic compared to main plaza areas. Solo raiders leverage this location for consistent farming without constant combat interruptions.
Hospital occupies the northwest corner of Buried City, offering exceptional loot density including Lance’s Mixtape, Showstopper grenades, and rare medical blueprints. Player rushes and camping create extreme danger – many squads sprint here immediately upon spawning then hold positions waiting for additional victims. Approach cautiously, scout thoroughly before committing, and consider alternative locations unless specifically targeting hospital-exclusive items. The risk-reward calculation favors avoidance for most farming sessions.
South of the highway, adjacent to Santa Maria Houses, a weapon crate spawns nightly inside a building with breachable door access. This location contains grenade chests, multiple lockers, duffel bags, and two safes, creating concentrated value within compact footprint. Strategic raiders incorporate this spot into circular night farming routes maximizing blueprint acquisition efficiency.
Spaceport delivers military-grade weapon-focused loot through sprawling container storage facilities and departure terminals. The map favors ranged combat through open sightlines and elevated positions, contrasting sharply with Buried City’s close-quarters emphasis. Cargo elevator extraction points create predictable bottlenecks where late-raid PvP intensity peaks as remaining players converge on closing exits.
Based on 4 128 reviews Based on 4 128 reviews | Location | Primary Loot | Container Density | PvP Risk | Best For |
|---|---|---|---|---|
| Container Storage | Weapons, Ammo | Extreme | Extreme | Squad combat |
| Departure Building | Blueprints, Attachments | Very High | Very High | Night farming |
| Medical Area | Medical items, Safes | High | Medium | Support farming |
| Rooftop Positions | Weapon crates | Medium | High | Sniper routes |
Spaceport delivers military-grade weapon-focused loot through sprawling container storage facilities and departure terminals. The map favors ranged combat through open sightlines and elevated positions, contrasting sharply with Buried City’s close-quarters emphasis. Cargo elevator extraction points create predictable bottlenecks where late-raid PvP intensity peaks as remaining players converge on closing exits.
Container Storage establishes Spaceport’s highest-value ARC RAIDERS BEST LOOT ROUTES territory, featuring shipping container clusters packed with weapon spawns and ammunition. Player competition reaches maximum intensity – multiple squads converge here immediately upon spawning, creating sustained firefights throughout raid duration. Only well-equipped squads with coordinated tactics should commit to this zone. Solo players find better efficiency elsewhere unless arriving during off-peak timing windows.
Second and top floors of various Spaceport buildings contain overlooked locker spawns providing excellent loot without ground-level chaos. Rooftop weapon crates spawn at elevator bases and building peaks, accessible via external ladders and ziplines. These elevated positions offer tactical advantages but attract sniper attention and limit escape options during ambushes.
Departure Building transforms during night raids, with security lockers increasing blueprint drop rates to 18% and rare material spawns doubling. Campers frequently stake positions here anticipating farming raiders, making pre-approach reconnaissance essential. Medical area provides safer alternative farming with multiple safes and moderate competition, suitable for solo players avoiding high-intensity combat zones.
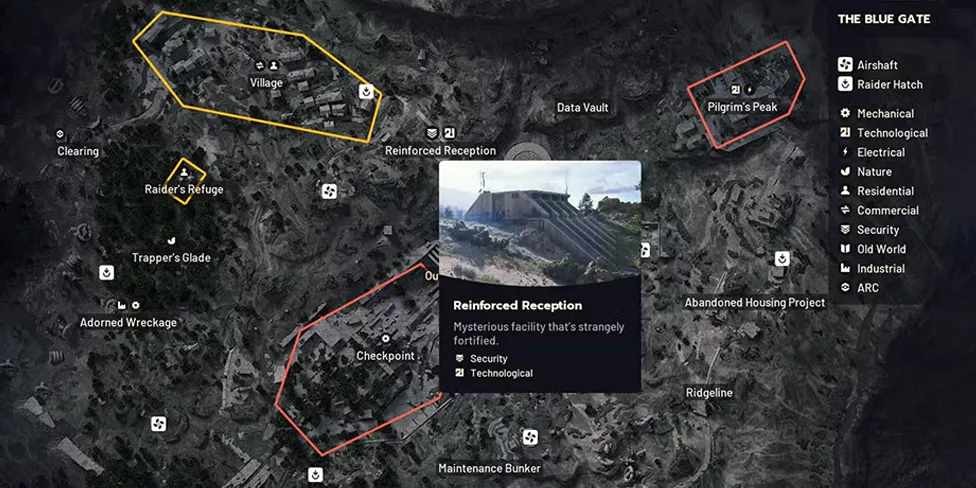
Blue Gate introduces unique puzzle mechanics rewarding exploration and problem-solving with premium loot rooms. The rural map features villages, fortifications, and olive groves providing diverse environmental navigation. Airshaft extraction points replace elevators, creating different tactical considerations during exit phases. Lower overall container density compared to urban maps demands efficient routing between concentrated loot clusters.
| Location | Primary Loot | Container Density | PvP Risk | Best For |
|---|---|---|---|---|
| Ancient Fort | Puzzle rooms, Weapon crates | High | High | Blueprint farming |
| Church | Puzzle rooms, Blueprints | High | Medium | Solo puzzle runs |
| Pilgrim’s Peak | Tech components, Wires | Medium | Low | Safe material farming |
| Olive Grove | Coins, Residential loot | Low | Very Low | Passive income |
| Maintenance Wing | Breach rooms, Epic loot | High | Medium | Underrated spot |
Blue Gate introduces unique puzzle mechanics rewarding exploration and problem-solving with premium loot rooms. The rural map features villages, fortifications, and olive groves providing diverse environmental navigation. Airshaft extraction points replace elevators, creating different tactical considerations during exit phases. Lower overall container density compared to urban maps demands efficient routing between concentrated loot clusters.
Ancient Fort and Church feature battery-placement puzzles requiring raiders find and transport three batteries to designated locations under time pressure. Church adds button-pressing sequences appearing randomly on rooftops and structures. Successfully completing puzzles unlocks hidden rooms containing duffel bags, weapon crates, security breaches, and multiple high-value lockers. Rewards include blueprint drops, augmentation blueprints, and processors – premium materials justifying puzzle time investment.
Barricade Kits and Jolt Mines assist puzzle completion by blocking ARC patrol paths and creating defensive perimeters during battery transport. Solo players complete puzzles methodically, while squads assign roles – one member transports batteries while teammates provide security against approaching threats.
Pilgrim’s Peak occupies Blue Gate’s eastern territory, providing tech components and electrical materials with minimal player competition. The location suits material farmers targeting specific crafting requirements without PvP engagement desires. Maintenance Wing breach room remains surprisingly underlooted despite containing Epic loot spawns and weapon crate access. This hidden gem location appears in few farming guides, maintaining lower competition compared to obvious destinations.
Olive Grove provides unique coin generation through tree chopping mechanics, offering passive income during otherwise unproductive travel between major POIs. While not primary farming destination, opportunistic resource gathering during route traversal adds cumulative value across multiple raids.
Based on 4 128 reviews Based on 4 128 reviews 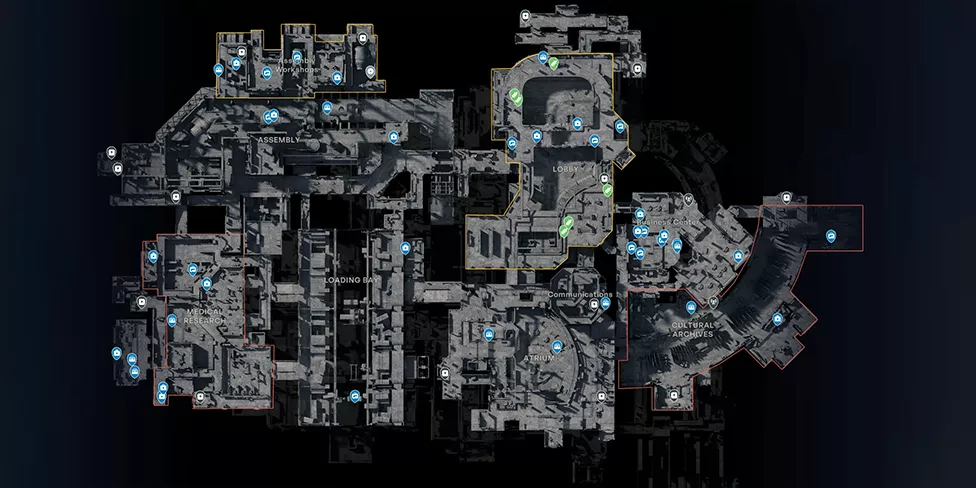
Stella Montis represents Arc Raiders’ newest and most challenging map, featuring multi-level underground research facility with maximum Epic loot concentration and extreme PvP intensity. The map delivers loot unavailable elsewhere while attracting the most competitive player population. Spawn proximity to loot zones eliminates extended approach periods, immediately throwing raiders into combat scenarios requiring instant tactical decisions.
| Location | Primary Loot | Container Density | PvP Risk | Best For |
|---|---|---|---|---|
| Medical Research | Vita Sprays, Epic materials | Extreme | Extreme | Endgame squads |
| Assembly Workshops | Epic materials, Weapons | Very High | Very High | Coordinated farming |
| Cultural Archives | Old World items, Coins | High | Medium | Sale farming |
| Sandbox A & B | Mechanical components | High | High | Component farming |
| Seed Vault | Seeds, Weapon crates | Medium | High | Disappointing returns |
| Lobby Area | Mixed loot | High | Very High | Spawn fights |
Stella Montis represents Arc Raiders’ newest and most challenging map, featuring multi-level underground research facility with maximum Epic loot concentration and extreme PvP intensity. The map delivers loot unavailable elsewhere while attracting the most competitive player population. Spawn proximity to loot zones eliminates extended approach periods, immediately throwing raiders into combat scenarios requiring instant tactical decisions.
Medical Research contains Stella Montis’s highest loot concentration including Vita Sprays, blue bandages, rare workshop materials, and new Epic-tier items exclusive to this map. Multiple attack angles and spawn point proximity create constant combat – expect encounters within 2-3 minutes of raid start. Only elite squads with optimized loadouts and communication should commit here. The risk-reward favors Medical Research only when pursuing specific high-value materials unavailable through safer alternatives.
Assembly Workshops provides slightly safer Stella Montis farming compared to Medical Research while maintaining excellent loot quality. Yellow cart containers spawn Epic materials with surprising frequency – single carts occasionally contain 4 Epic items simultaneously. Shredders, Pops, and Fireballs (ARC enemy types) patrol heavily, creating PvE challenges balancing PvP threats. Spawn point proximity still generates early combat, but tactical players leverage ARC presence to discourage aggressive player approaches.
Assembly Workshops Hatch extraction enables convenient escape routing – spawn western side, traverse workshops collecting loot, extract southeastern hatch within 15-20 minutes. This efficient loop minimizes danger exposure while maximizing loot throughput, becoming the recommended Stella Montis approach for solo raiders.
Cultural Archives warehouse concentrates Old World sale items including books, paintings, and mixtapes. Narrow corridors and abundant cover create interesting close-quarters combat scenarios. Player traffic remains moderate since Arc Raiders loot farming serious players prioritize Epic material zones over coin-generation locations. This makes Cultural Archives suitable for raiders preferring steady safe income over high-risk gambling.
Sandbox A and B specialize in mechanical components with heavy ARC presence deterring casual visitors. Shredders, Pops, and Fireballs create genuine PvE difficulty demanding proper energy weapon loadouts and tactical positioning. Lower player traffic emerges from ARC deterrence – most raiders avoid Sandbox unless specifically targeting mechanical components for crafting requirements.
Seed Vault represents puzzling design – red zone classification suggests premium loot, yet seed pod containers yield single seeds rather than bulk quantities. Additional weapon crate spawns somewhat redeem the location, but overall loot density fails justifying the danger level and fuel cell entry requirements. Community consensus recommends avoiding Seed Vault until potential rebalancing addresses the seed scarcity issue.
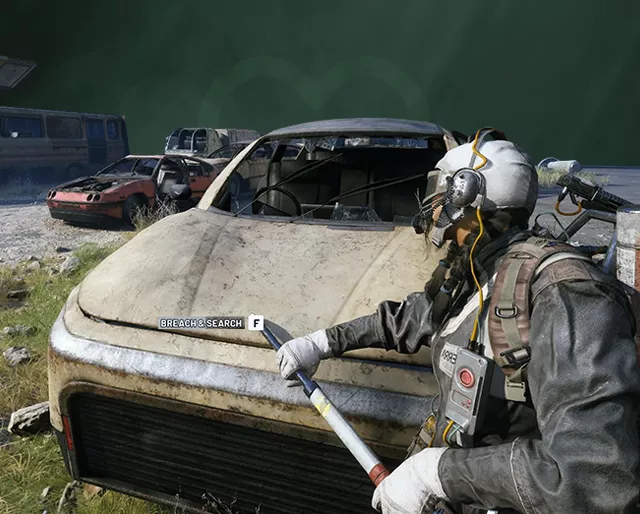
Understanding ARC RAIDERS EXTRACTION GUIDE mechanics determines raid success – perfect farming means nothing if you die during extraction. Four extraction types serve different strategic purposes: Cargo Elevators, Metro Stations, Airshafts, and Raider Hatches. Each creates unique tactical challenges requiring adapted approaches.
| Extraction Type | Maps | Noise Level | Wait Time | Timer | Key Required |
|---|---|---|---|---|---|
| Cargo Elevator | Dam, Spaceport | Very Loud | 90 seconds | Yes | No |
| Metro Station | Buried City, Stella Montis | Very Loud | 90 seconds | Yes | No |
| Airshaft | Blue Gate, Stella Montis | Loud | 60-90 seconds | Yes | No |
| Raider Hatch | All Maps | Silent | Instant | No | Yes |
Public extraction points provide free universal access but broadcast your position through loud activation alarms. Cargo elevators (Dam Battlegrounds and Spaceport) and metro stations (Buried City and Stella Montis) require 90-SECOND wait periods from activation to departure. Airshafts (Blue Gate and Stella Montis) function similarly with slightly variable timing. These extraction points feature individual shutdown timers – when countdown reaches zero, that specific exit closes permanently for the raid’s remainder.
Tactical extraction at public points demands reconnaissance before commitment. Scout the area 30-60 seconds observing for player movement, listening for gunfire, and identifying ARC patrol patterns. Smoke grenades become essential – deploy immediately upon elevator arrival, obscuring sniper sightlines while boarding. Never stand directly on extraction entrance during wait period; maintain defensive position with cover and sightline control.
Late-raid extraction creates danger concentration – as multiple exits close, remaining players converge on final active points. Extract earlier with moderate loot rather than gambling late with full inventory. The extra 5-10 minutes rarely justifies catastrophic loss risk.
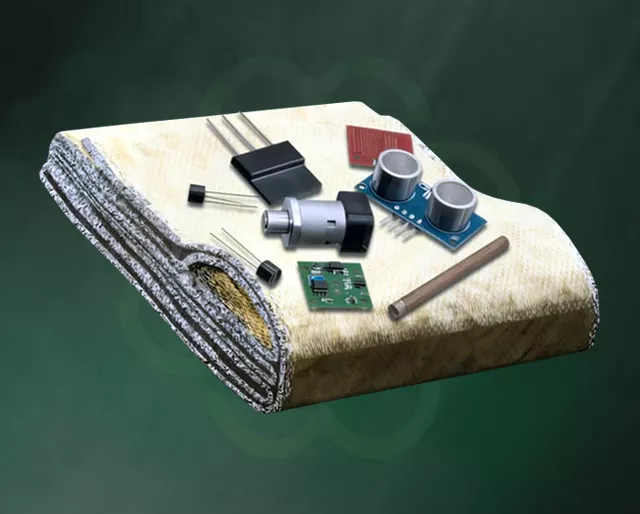
Raider Hatches represent ultimate extraction safety through silent activation and instant departure without wait periods or shutdown timers. These hatches require single-use Raider Hatch Keys, obtainable through crafting (Advanced Electrical Component + 3 Sensors at Utility Station Level 2), vendor purchase (9,000 coins from Shani, Level 12 unlock, 24-HOUR cooldown), or random loot discovery. Keys should be stored in Safe Pockets preventing loss on death.
Strategic raiders carry hatch keys during high-value missions where guaranteed extraction justifies the 9,000 coin cost or crafting materials investment. Using hatches enables aggressive farming in dangerous zones knowing silent escape remains available regardless of player convergence at public exits. One key extracts entire squads, but hatches close quickly requiring tight positioning and communication timing.
What’s the best map for blueprint farming?
Buried City during night raids provides optimal blueprint farming through Piazza Roma/Arbusto security lockers with 16-18% drop rates, balanced by moderate PvP compared to Stella Montis’s extreme competition.
Should I farm Dam Battlegrounds or rush to Stella Montis?
Farm Dam Battlegrounds until achieving 850+ equipment rating and mastering basic mechanics; Stella Montis’s extreme PvP intensity punishes undergeared raiders attempting premature access.
How do I know which extraction points close first?
Check map countdown timers – each extraction displays remaining time before closure; plan routes toward exits with 10+ minutes remaining rather than gambling on nearly-closed alternatives.
Are Raider Hatch Keys worth 9,000 coins?
Yes for high-value missions carrying rare blueprints or Epic materials where guaranteed silent extraction justifies cost; no for routine material farming where public elevators suffice.
What’s the safest loot route for solo players?
Blue Gate’s Maintenance Wing and Pilgrim’s Peak provide excellent loot-to-risk ratios, or Dam Battlegrounds Electrical Substations for pure material farming with minimal combat exposure.
Why do some containers spawn better loot at night?
Night raids apply server-wide multipliers doubling blueprint drops and increasing rare spawns by 40%; red zone security lockers reach 18-22% blueprint rates during darkness.
Mastering ARC RAIDERS MAP GUIDE navigation transforms random wandering into systematic resource extraction – knowing that Medical Research dominates Epic farming while Electrical Substations provide safe battery gathering enables strategic mission planning. Your extraction success rate directly correlates with map knowledge depth – understanding which ARC RAIDERS LOOT LOCATIONS spawn specific materials, when night multipliers justify timing adjustments, and how Raider Hatch positioning enables aggressive farming strategies.
Commit to learning one map thoroughly before diversifying – internalize POI layouts, container positions, and optimal circular routing before attempting multi-map mastery. Start with Dam Battlegrounds establishing material stockpiles, transition to Buried City for blueprint collection, then tackle Stella Montis only after achieving competitive equipment ratings and mechanical confidence. Use ARC RAIDERS EXTRACTION POINTS strategically – early extractions with moderate loot outperform late gambling with full inventories. Now study these routes, practice navigation without constant map checking, and transform map knowledge into consistent extraction success across all five territories.
READ MORE