


Mastering Arc Raiders advanced crafting chains transforms you from survival-focused player to economy-dominating craftsman. The difference...
Arc Raiders Weekly Objectives are the cornerstone of competitive progression in Nexon’s tactical extraction shooter. Every Monday, five new challenges reset, offering raiders a structured path to climb seasonal leaderboards and unlock exclusive cosmetics, blueprints, and rare loot. Whether you’re chasing top-tier rewards or building consistency, understanding how the arc raiders weekly objectives guide system works is essential. This article breaks down every objective type, scoring mechanics, farming strategies, and optimization tactics to help you dominate this week’s trials and maximize your weekly point potential without burning out.

The Trials system forms the competitive backbone of Arc Raiders, launching after reaching character level 15. Every Monday at weekly reset, five new arc raiders challenge types explained emerge from a rotating pool, requiring you to complete specific objectives while surviving and extracting. Your highest personal score per challenge counts toward seasonal ranking – you don’t accumulate multiple attempts into one total.
This creates strategic tension: rushing five objectives in one raid spreads your focus thin, whereas targeting a single challenge with optimal preparation typically yields higher scores. Most top-ranked raiders dedicate entire sessions to perfecting one objective before moving to the next.
Weekly Trials are the only way to unlock exclusive seasonal skins (Alpino Outfit, Patrol variants, and beyond). But each week brings new objectives, new modifiers, and if you’re not top-30, you miss double rank progression. The guaranteed way to never miss a seasonal reward – let our veterans handle it. We know where ARCs spawn, how to farm materials faster than anyone, and how to maximize points on night raids and EM Storm modifiers. Buy the Arc Raiders boosting from LepreStore and grab every seasonal cosmetic.
Points accumulate during gameplay but only finalize upon successful extraction. If you die mid-raid, regardless of progress, those points vanish entirely. This extraction dependency directly influences risk assessment – extracting with guaranteed points often beats pushing for marginal gains and losing everything.
Map modifiers (Night Raid, Electromagnetic Storm, Hidden Bunker) activate a 2x multiplier on all Trial Points earned during that modifier window. Players competing for high leaderboard positions almost exclusively run Trials during these 2x windows to maintain competitive pace. Understanding arc raiders objectives points guide mechanics ensures you maximize efficiency during prime farming hours.
 Based on 4 128 reviews
  Based on 4 128 reviews
 Combat-focused objectives dominate the Trial pool. These arc raiders enemy elimination challenges guide require identifying, tracking, and efficiently eliminating specific ARC types while managing ammunition, healing resources, and team positioning.
Ground-based ARC enemies encompass all non-flying threats – Leapers, Bombardiers, Bastions, Pops, Fireballs, Ticks, and the endgame Queens and Matriarchs. Scoring 0.8 points per damage point applied makes this a grinding objective rather than a swift one – you’re accumulating incremental damage across an entire raid rather than banking points from single eliminations.
The challenge lies in high-traffic areas where dozens of raiders congregate, making survival and loot retention difficult. Dam Battlegrounds offers the safest farming locations: Water Treatment and Red Lake spawn Leapers consistently, Primary Facility hosts Bombardiers, and Hydroponic Tower guarantees Bastion encounters.
Experienced squads bring heavy ammunition weapons (Anvil III, Showstoppers), Blaze Grenades to damage weak spots, and mobility tools to avoid rival raider engagements. Vertical positioning breaks ARC AI pathing, giving you reload windows.
Leapers represent mid-tier threats offering 1,760 points per destruction, making them prime targets for dedicated farming. Post-Hullcracker nerf, their increased lethality demands careful positioning – don’t linger near spawn points or you’ll prevent respawns, but pushing too aggressively invites overextension deaths.
Route planning trumps raw damage output here. Mark Leaper spawns on your mental map (Water Treatment, Red Lake, Breach, Testing Annex), rotate efficiently, and extract once you’ve secured consistent, safe kills. Solo players should expect lower scores than trios, as Leaper health pools reward sustained coordinated fire.
Flying enemies demand energy weapons and precise aim to drop efficiently. Wasps yield 220 points per kill, Hornets contribute modest damage scaling, while Rocketeers command 1,320 points per elimination, making them the premium air target.
The Snitch Scanner farming exploit leverages deployed scanner grenades to trigger mass spawns of flying enemies, then systematically destroying them for ridiculous point accumulation (experienced farmers report 70,000+ scores per run). This method requires 60+ pre-farmed Snitch Scanners and significant preparation but dominates leaderboards during flying enemy weeks.
Casual players should focus on natural spawns during Electromagnetic Storms (doubled points multiplier), where probe density naturally increases and flying enemies cluster defensively.
Non-combat trials shift focus toward exploration, scavenging, and map knowledge rather than gunfighting prowess. These arc raiders resource collection objectives encompass gathering, looting, and data retrieval mechanics.

Prospecting probes yield 667 points per breach, making them one of the highest-value gathering objectives per action. Critically, you don’t need to actually breach probes to score – merely looting them counts toward your trial total. This distinction confuses many raiders and costs them optimal strategies.
Arc raiders prospecting probe events spawn abundantly during Electromagnetic Storms in clustered groups of three, typically available at session start before they despawn mid-raid. Learn probe spawn density locations, enter during the 2x modifier window, and systematically loot without engagement to accumulate rapid scores. Red Lake on Dam Battlegrounds offers exceptional probe concentration, making it the premier arc raiders objective locations map guide destination for this category.
Based on 4 128 reviews Based on 4 128 reviews Supply Drops reward 800 points per search – second-highest gathering value after probes. Call supply drops via terminal, loot them safely, and rotate to the next terminal to maximize efficiency. First Wave Husks yield 400 points per discovery, requiring you to locate and interact with deceased raider corpses scattered across maps.
Both objectives benefit from extended map familiarity. Players who memorize supply drop call locations and Husk spawn zones farm these rapidly, while unfamiliar raiders waste time searching.
Plant harvesting yields 370 points per collection at Dam Battlegrounds, where flora concentrates in resource-rich biome areas. Deliver carriables (Field Crates, supply containers) reward 500 points per successful deposit into collection points.
These objectives prioritize map knowledge and route optimization over combat skill. Crate delivery proves particularly frustrating due to spawn radius variance (15 potential spawn points per field depot, sometimes 1 kilometer apart), demanding careful loadout planning and mobility tool management.
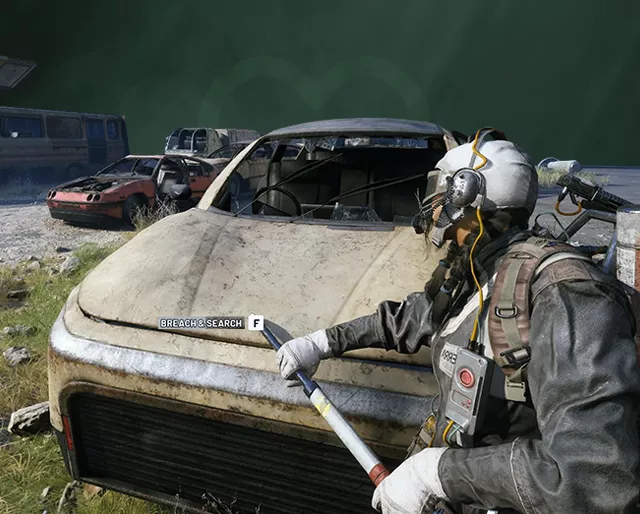
Specialized arc raiders hidden bunker trials represent high-risk, time-intensive challenges with point caps limiting maximum weekly earnings despite effort investment.
⚔️ DOWNLOAD DATA DURING HIDDEN BUNKER
Hidden Bunker data downloads cap at 6,400 total points (eight terminals x 800 points each). Despite this low ceiling, many players target this objective during solo lobbies due to friendlier PvE environments. The time investment versus reward ratio remains unfavorable compared to optimized combat or gathering strategies.
Solo execution proves significantly safer than squad-based attempts, as lobbies prioritize cooperation and reduced extract griefing. Plan approximately 20-30 minutes per full Hidden Bunker clear.
⚔️ DAMAGE QUEEN AND MATRIARCH ENCOUNTERS
The endgame bosses – Queen and Matriarch – reward 0.7 points per damage point but demand coordinated team fire, extensive ammunition stockpiles, and precise weak-spot targeting. Their leg joints expose critical head vulnerabilities only after sustained armor saturation.
These encounters remain technically possible solo but represent poor time-to-point conversions compared to other arc raiders damage accumulation challenges guide alternatives. Most competitive raiders skip boss damage trials entirely unless squad coordination and ammunition supplies permit optimized farming.
Knowing where objectives spawn across all maps dramatically accelerates farming velocity. Dam Battlegrounds hosts the highest density of combat and gathering opportunities, making it the default competitive trial arena. Arc raiders collection trial locations concentrate in specific high-value POI clusters that tier-1 teams exploit systematically.
Dam Battlegrounds Key Locations:
Buried City offers higher-level loot but reduced trial-optimal enemy density. Acerra Spaceport and Blue Gate provide alternative trial farming when Dam rotation diversity becomes stale.
Route planning means:
Based on 4 128 reviews Based on 4 128 reviews Top leaderboard players dedicate entire sessions to perfecting one objective. This permits:
Spreading effort across all five weekly challenges weekly simultaneously dilutes effectiveness and reduces personal best scores.
2x point multiplier windows (Night Raid, Electromagnetic Storm, Hidden Bunker active) warrant concentrated trial farming. Missing these multiplier activations means you’ll need double the runs to achieve identical leaderboard positioning compared to competitors farming during windows.
Competitive seasons are effectively decided during the opening weekend when raiders optimize modifier schedules around work/life obligations.
Different objectives demand specialized gear:
Pre-raid loadout determination prevents in-match scrambling and dead weight inventory slots.
Jumping to rooftops, ledges, and elevated platforms forces ARC units to reposition, creating temporary vulnerability windows for sustained damage or ammunition replenishment. Vertical farming extends survival time and multiplies damage output efficiency.
Deploying 20-40 pre-farmed Snitch Scanners in localized zones triggers mass flying enemy spawns. Systematic destruction generates exponential point accumulation – experienced farmers consistently exceed 50,000 points per run during flying enemy weeks.
This method requires preparation (farming 60+ scanners beforehand) but provides unmatched efficiency once scaled up.
Extract with guaranteed points rather than risking everything for marginal score improvements. Successful extract beats failed greedy runs yielding zero points. Conservative extraction scaling creates reliable leaderboard climbing across entire seasons.
Trio play amplifies effectiveness through:
Solo players face mathematical disadvantage but remain competitive through route optimization and specialist preparation.
do trial points accumulate across multiple runs or count only the highest single-run score?
Only your personal best single-run score per objective counts toward weekly ranking. Multiple runs don’t stack – you need one explosive run per challenge rather than consistent grinding across 10 mediocre attempts.
can i earn trial rewards multiple times per week from the same objective?
No. Each challenge awards its tiered rewards (1-star at 1,000 points, 2-star at 2,500 points, 3-star at 4,000 points) exactly once per weekly cycle. Exceeding 4,000 points yields no additional rewards – your ranking score continues climbing but items don’t duplicate.
how much do map modifiers actually boost trial points?
Night Raid, Electromagnetic Storm, and Hidden Bunker active events double all Trial Points earned during that modifier’s duration. This 2x multiplier applies universally across all objective types, making modifier windows exponentially more valuable than standard raids for leaderboard progression.
are trial scores identical for solo versus trio play?
No. Trio play enables sharing of gathered resource scores and coordinated damage against high-health enemies, creating exponentially higher point totals than solo equivalent efforts. Current leaderboards lack solo-versus-group segmentation, systematically disadvantaging solo raiders.
what happens to trial progress if i die before extracting?
All accumulated points vanish entirely. You extract with zero score for that run, making extraction security paramount regardless of hypothetical point totals achieved mid-raid. This mechanic forces constant risk-reward assessment throughout each trial run.
should i ignore objectives with low point caps like hidden bunker data downloads?
Most competitive players do. Hidden Bunker’s 6,400-point ceiling combined with 20-30 minute time investment yields inferior efficiency compared to combat or gathering objectives. Casual players targeting seasonal progress rather than leaderboard placement may find value in variety despite lower output.
Arc Raiders weekly objectives form the competitive progression skeleton, demanding strategic preparation, route optimization, and consistent execution across seasonal cycles. Successful players master all arc raiders trials challenges breakdown mechanics while specializing deeply in 1-2 objectives matching their playstyle and squad composition. Whether grinding leaderboard dominance or casually accumulating seasonal ranks, weekly trial mastery transforms casual raids into purposeful, efficient farming sessions. The arc raiders challenge types explained framework rewards knowledge, consistency, and adaptation – skills that extend beyond trial farming into general extraction shooter excellence. Start with your preferred objective type, memorize spawn locations, and optimize your loadout accordingly. Next week’s reset brings fresh challenges, but the foundational strategies remain constant.