The most practical way to farm rare weapons in ARC Raiders is to check several nearby Weapon Case spawn points, loot any reachable Security Lockers if you have Security Breach, then extract before the extra detour becomes a bad trade. A Weapon Case is a possible source of a ready-to-use gun, not a guaranteed Epic. Your best route changes with your spawn, the containers that appeared in this session, the active map condition and the exit you can reach.
This guide covers weapon farming routes on all seven maps, including Riven Tides and Pendola Pass in Frozen Trail Update 2.2. It separates weapons found in a raid from crafting blueprints and boss materials, so you do not spend an evening farming the wrong source. If you mainly want to know which gun wins a fight, use the ARC Raiders Weapon Tier List. Here, the question is where to look and when to leave.
Key Takeaways
- Weapon Cases contain weapons, matching ammunition and sometimes attachments or gun parts. Their possible locations are learnable, but the case itself may be absent on a particular run.
- Security Lockers can offer weapons and components, including occasional Epic finds. They spawn dynamically across maps and require the Security Breach skill; no verified universal Purple drop percentage exists.
- Spaceport, Dam Battlegrounds and Buried City offer useful short checks; newer maps provide additional alternatives, especially Riven Tides and Pendola Pass.
- On Pendola Pass, Dynamic Loot Zones change the value of areas from one raid to the next. A named POI is a place to check, not a repeatable payout.
- Need a specific crafting recipe? Use the blueprint catalog or Research Station rather than assuming the finished gun and its blueprint have identical sources.
- Plan an exit before your first case. A gun that never makes it back to Speranza does not solve your next-loadout problem.
Where to Look First: Ready-Made Guns vs. Blueprints
The fastest mistake to fix is searching every container as though it served the same purpose. Pick your target before loading in.
| Source | What it can help you obtain | Best decision |
|---|---|---|
| Weapon Case | A weapon and its matching ammo, plus weapon-related loot. | For a usable gun this raid, check several possible case spots close to your spawn. |
| Security Locker | Weapons, ammo and components, occasionally high-rarity items. | Only include these stops if your current build has Security Breach. |
| Raider Containers, quests, Trials and research | Blueprints or a controlled path toward a recipe. | Use these when long-term crafting access matters more than one found gun. |
| Queen / Matriarch salvage | Legendary reactors used in particular Legendary crafts. | Plan a separate encounter and recovery run; do not treat a reactor as a ready-made gun. |
| Ordinary industrial or residential loot | Supporting crafting components and other loot. | Make opportunistic stops, but do not replace every weapon-case check with drawers. |
Fast choice: Need a gun to use or sell today? Start with cases. Need to make that gun repeatedly? Follow its recipe and the required station. Need a Legendary? Confirm the specific blueprint and ingredients first; a boss reactor alone does not finish the craft.
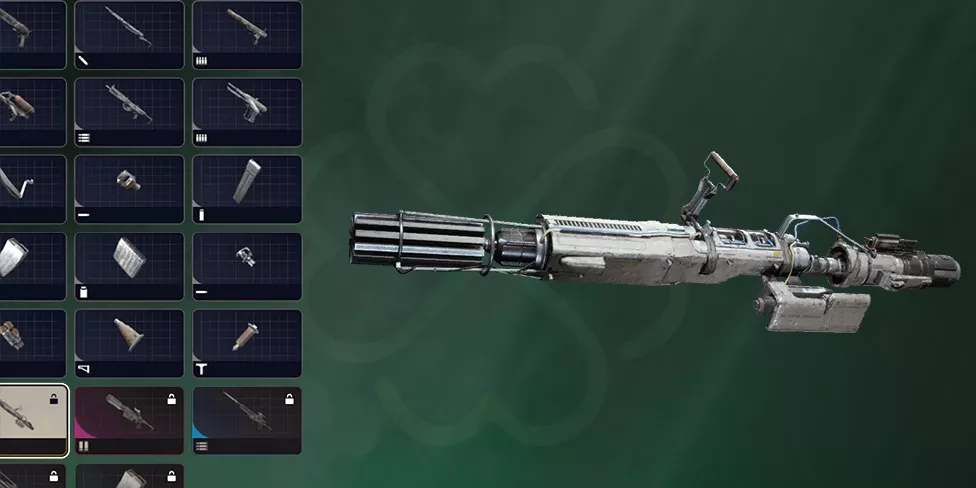
Use a Ready Loadout or Farm the Cases Yourself
Once you know whether you need a usable gun now or a repeatable route, compare a listed loadout option with a DIY map-based farm.
The Three-Stop Weapon Farming Method
Do not memorize a fixed cross-map marathon. A solid route uses your present spawn, two or three nearby checks, and an exit you have already identified. The location list below names possible Weapon Case spots, not guaranteed items.
- Choose your goal. Decide whether you need any usable Rare/Epic gun, a particular ammo class or materials for a future craft. A route aimed at any weapon is different from a specific-blueprint search.
- Open the map immediately. Check the condition, the closest known weapon-container area and the available extraction markers. On Pendola Pass, account for the Gondola route.
- Check the nearest possible case. Search the actual room, rooftop or container position. If a case did not spawn, move to the next planned spot; do not camp an empty location.
- Inspect one nearby alternative. A second Weapon Case or an accessible Security Locker is useful. A third check is optional if movement is safe and you still have room.
- Reassess after the valuable find. A Rare or Epic weapon may make the next risky building unnecessary. Confirm remaining carry weight, consumables, threats and exit time.
- Extract with the find. Use the exit that is actually open, not the one a static guide calls “safest.” If the approach is occupied, switch to your fallback while time remains.
When your first route fails, change which cluster you inspect, not simply how long you grind. Weapon Case locations are potential spawns, and other players can loot them before you arrive.
| If this happens… | Change your plan to… |
|---|---|
| The first case spot is empty | Check one more possible case in the same area; do not stand around waiting for a spawn. |
| You find an Epic weapon early | Check the nearest viable extraction and skip optional high-risk loot. |
| The main building is occupied | Take a side route or move to your fallback area; a PvP fight is not required for a farming run. |
| Your backpack is already heavy | Stop collecting low-value material stacks that prevent you from carrying another gun. |
| You are low on healing or ammo | Prefer extraction to a long trip toward another marked case. |
| You find a blueprint instead | Keep it safe and extract; research the recipe after returning, not in an exposed room. |
Rare Weapon Farming Routes on All Seven ARC Raiders Maps
Use these as short conditional route pairs. The named areas are supported possible Weapon Case locations, but the loot is dynamic. Start at the cluster closest to your actual entry point and only chain the second cluster if the route is still reasonable. The Map Guide owns the full map and exit coverage; the checks below focus on weapon-bearing containers.
| Map | First useful checks | When to leave or switch |
|---|---|---|
| Dam Battlegrounds | Research & Administration, Water Treatment Control, Hydroponic Dome Complex | Stop after a worthwhile case, or choose a nearer exit rather than crossing the Dam for another spot. |
| Spaceport | Arrival Building, Departure Building, Launch Towers | These POIs can attract Raiders. Skip the next building if the approach is already contested. |
| Buried City | Piazza Arbusto, Santa Maria Houses, Grandioso Apartments | Roofs and station approaches can be watched from several angles; keep a nearby metro route. |
| The Blue Gate | Checkpoint, Security Wing, Data Vault | Use one connected area rather than forcing a long underground detour with a closing airshaft. |
| Stella Montis | Security Bridge, Cargo Dock B, Cafeteria | Multiple floors make simple-looking distances deceptive; keep the same-level exit in mind. |
| Riven Tides | Stacking Yard, Hotel Panorama Azzurro, Port Authority Building | Treat the Stacking Yard puzzle as optional; a found weapon may be worth more than another exposed stop. |
| Pendola Pass | Railyard, Old Town, Commissary Supermarket | Dynamic zone values change; choose the nearest active Gondola plan before extending the farm. |
Dam Battlegrounds: Easy Repeatable Checks, Not Guaranteed Loot
Route choice A: If you enter near Research & Administration, inspect the accessible case locations around that complex and nearby Water Treatment Control before deciding whether to continue. Route choice B: When you spawn closer to Hydroponic Dome Complex, check its indoor case spots and a nearby Power Generation-side option. Both are shorter plans than moving across the entire map just to chase one case.
The old guide called a “West Broken Bridge Hidden Vault” a near-guaranteed two-minute farm. Treat broken-bridge cases as possible finds instead. Community location maps identify an East Broken Bridge hidden recess and other damaged-bridge spots, but no fixed 80% rare-weapon success rate. Control Tower locked rooms can be worth checking when you already have access; they are not beginner-friendly default stops if the entrance is occupied.
Spaceport: Arrival and Departure, Then Decide
Start at the Arrival Building or Departure Building cluster nearest your deployment. Both have several mapped potential case locations; Launch Towers is a reasonable optional second area when travel and exposure make sense. Some extra Fuel Lines locations are tied to specific map conditions, so do not expect an identical set of cases every session.
Spaceport has long outdoor approaches. Check rooftops and upper windows before crossing open ground. The old claim that Security Lockers only exist on Spaceport is outdated; include a locker only when one actually appears and you have Security Breach. An empty Departure room should send you to a nearby alternative, not to a guaranteed-payout checklist.
Buried City: Compact Checks with Rooftop Risk
Near Piazza Arbusto or Santa Maria Houses, look through the mapped case positions before moving toward an active metro route. If your starting side is closer to Grandioso Apartments, use that cluster instead of crossing the whole city. Marano Station also has possible case locations, but a station can be busy because other Raiders are preparing to extract.
Buried City rewards knowing how to reach a room from an adjacent roof or stairwell. It does not promise a certain Purple item per rooftop circuit. Avoid turning a good two-room run into a long exposed trip just because an old route says a particular apartment “always” pays.
The Blue Gate: Check the Right Facility, Not Every Locked Room
Check accessible Weapon Case spots around the Checkpoint, Security Wing or Data Vault, according to your entry side. A locked or puzzle-linked area can add another opportunity when you already have the means to access it. If solving or breaching takes longer than the loot is worth, continue with your original exit plan.
The old Red Room advice confused puzzle loot with a guaranteed source of Epic weapons. A puzzle is an optional loot action; it does not set a universal rarity for every item inside. For each underground detour, plan how to get back to the active airshaft and watch corridors where another squad can control the doorway.
Stella Montis: Short Interior Loops
Stella Montis has fewer catalogued normal-condition Weapon Case spots than the large outdoor maps, but the building stacks multiple floors in a small footprint. Choose a local loop around Security Bridge or Cargo Dock B; Cafeteria and Robotic Sandbox areas give other possible checks when nearby. Verify the correct floor before committing to a long corridor.
Do not assume a quiet-looking room is uncontested. ARC threats, players moving between floors and limited sightlines can turn a simple case run into a fight. If the useful weapon is already in your bag, take the nearest sensible metro or airshaft route rather than making one more trip across the complex.
Riven Tides: Stacking Yard and Port-Side Alternatives
At Stacking Yard, inspect the available Weapon Case positions first. There is also a separate loot-room puzzle here, but you do not need to solve it just to make the rest of your route worthwhile. Other possible clusters include Hotel Panorama Azzurro and the Port Authority Building. Choose whichever is on your present side of the map, not an imaginary straight line connecting all three.
Embark raised overall loot value on Riven Tides in Frozen Trail by approximately 15%. That is a map-wide value adjustment, not a published 15% increase to your chance of finding a specific Epic rifle. Coastal and harbour routes can be exposed; get the exit plan sorted before the next container stop.
Pendola Pass: Railyard, Old Town and Dynamic Loot
Pendola Pass has a wide set of mapped possible case positions around Railyard, Old Town, Commissary Supermarket and Cielo Sereno Observatory. Pick one cluster near your spawn, then another only if the terrain, weather and ARC presence permit it. Some spots have conditional availability, and not every location is filled in one session.
Dynamic Loot Zones can make one area more valuable in one raid and less valuable in another without changing its basic loot category. This is precisely why a static “best weapon route” cannot promise a fixed return. Pendola Pass also uses Ballistic Gondolas for extraction. Confirm a transceiver and its landing path before filling your backpack. For the latest extraction steps, see the Safe Exits guide.
Weapon Cases vs. Security Lockers: What Changes With Security Breach?
Weapon Cases can be searched without the Security Breach skill. They are worth checking on budget runs because you do not need to spend points on a dedicated loot perk to open one. Security Lockers, by contrast, require Security Breach. That skill remains in the reworked Survival tree, among the later branch choices, so consult your current talent allocation before planning a locker-heavy route.
Security Lockers are dynamic and distributed across maps. They can contain weapons and parts, including occasional Epic weapons or Complex Gun Parts. Neither the game developer nor the available loot reference provides a universal 1-in-10 or 45% Epic drop guarantee for these containers. A few good locker results are not enough to prove a stable farming rate.
| Your character | Route priority | Avoid this mistake |
|---|---|---|
| No Security Breach | Weapon Cases, regular accessible loot and safe exits. | Wasting time at a Security Locker you cannot interact with. |
| Has Security Breach | Include nearby spawned Security Lockers alongside cases. | Searching the whole map for a locker that may not have spawned. |
| Owns several weapon blueprints | Farm relevant crafting materials or choose a ready-to-use gun. | Treating every weapon drop as necessary when you can craft a replacement. |
| Needs one specific Epic recipe | Check the known blueprint source or research method. | Assuming an Epic gun in a case unlocks its blueprint. |
Which Rare Weapons Are Worth Carrying Out?
For a weapon farming guide, rarity matters because it affects the value of the find and how easily you can replace it. It does not mean every higher-rarity item fits your playstyle. Here are familiar examples, not a combat ranking:
| Example | Current rarity | What to check before keeping it |
|---|---|---|
| Anvil | Rare (Blue) | Useful across different raid goals; its rarity changed from Uncommon in Update 2.0. |
| Osprey | Rare (Blue) | A scoped bolt-action rifle using Medium Ammo; useful only if you expect ranged fights. |
| Tempest | Epic (Purple) | An automatic Assault Rifle using Medium Ammo; consider its weight and your backup ammunition. |
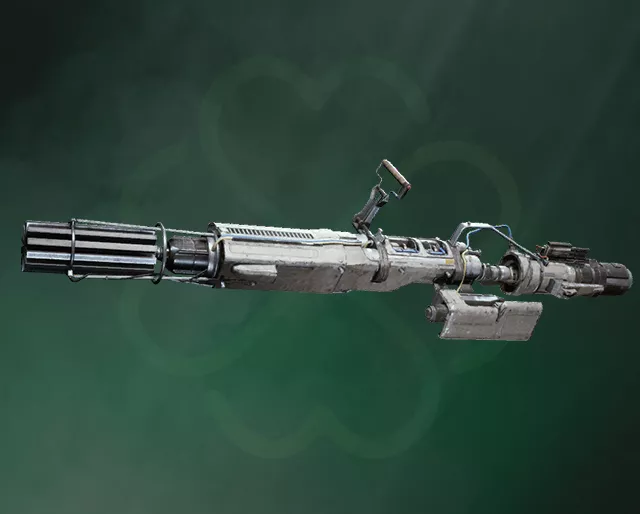
| Aphelion | Legendary | A crafted energy battle rifle requiring a learned recipe and a Matriarch Reactor. |
| Equalizer / Jupiter | Legendary | Energy weapons that use Queen Reactor-based recipes; do not confuse the reactor with the finished gun. |
| Dolabra | Legendary | A crafted energy shotgun with a separate component recipe; not a Queen or Matriarch reactor craft. |
Choose based on your current kit, ammo supplies, durability and next objective. If you find a valuable gun you cannot afford to lose, extracting is often better than holding a position to search two ordinary drawers. For comparative PvP and PvE choices, return to the Weapon Tier List.
Finished Weapon, Blueprint or Research: Choose the Right Farm
Finding a gun is temporary. A learned blueprint can let you craft replacements, provided you meet the station and material requirements. Frozen Trail also introduced the Outpost and Research Station, creating additional controlled blueprint paths for supported items. If you want to stop relying on random weapon drops, check what your particular recipe needs before choosing another raid.
For example, the Anvil Blueprint has a Research Station route requiring Research Points and other ingredients; that is a different task from hoping a random Weapon Case contains a finished Anvil. Other recipes may be tied to quests, Trials, special containers or map conditions. The All Blueprints guide owns the source and recipe catalogue; do not infer a universal blueprint percentage from weapon-container data.
Unlock the Recipe or Research Its Sources
Once you have tried a short case route, decide whether you want the ability to craft more copies. Confirm that the exact recipe is listed before ordering.
Legendary Weapon Farming: Reactors Are Materials, Not Guns
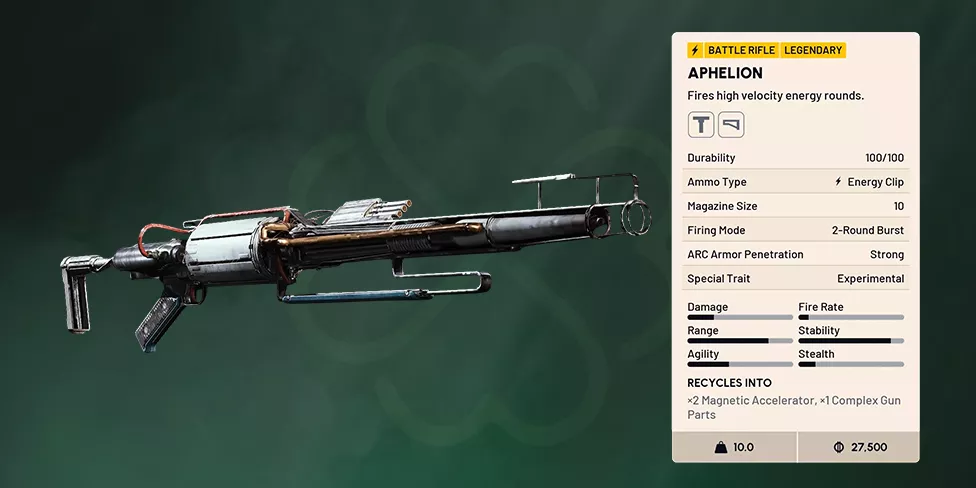
Legendary gear uses a different progression path from an ordinary Weapon Case farm. In particular, the Queen Reactor and Matriarch Reactor are Legendary materials found by scavenging the corresponding major ARC enemies. They support specific weapon recipes, but do not themselves turn into a gun when picked up. You still need the blueprint, other materials and the required crafting station.
| Finished weapon | Relevant ingredients | Practical next step |
|---|---|---|
| Aphelion | 1 Matriarch Reactor, 3 Magnetic Accelerators, 3 Complex Gun Parts; Aphelion Blueprint. | A Matriarch-focused salvage run and Gunsmith 3 craft. |
| Equalizer | 1 Queen Reactor, 3 Magnetic Accelerators, 3 Complex Gun Parts; Equalizer Blueprint. | Confirm recipe access, then plan Queen salvage and Gunsmith 3. |
| Jupiter | 1 Queen Reactor, 3 Magnetic Accelerators, 3 Complex Gun Parts; Jupiter Blueprint. | Use the same reactor family, but a separate learned recipe. |
| Dolabra | 3 Shredder Gyros, 3 Magnetic Accelerators, 2 Vaporizer Regulators; Dolabra Blueprint. | Different material route, Gunsmith 3; not a Queen/Matriarch reactor recipe. |
Do not use the old guide’s estimated “30–50% reactor chance,” “45% hard-raid drop” or “20–30 security runs per Legendary” as planning facts. They were not backed by a current primary drop table. If a component is hard to obtain, choose the required item by name and plan its actual enemy, station or recipe source. For bills of materials, Refiner decisions and make-or-recycle trade-offs, see Advanced Crafting Chains.
Gather the Right Components, Not More Random Guns
Legendary and high-tier crafting can be blocked by a small set of missing materials. Check the precise bill of materials before committing to another encounter.
Do Night Raids or Storms Guarantee Better Weapon Drops?
No published universal rate proves that every Night Raid raises your Epic weapon chance by 20–30%, or that storms guarantee Legendary loot. Map Conditions can change what is available and how the map plays; they also introduce extra danger. Use the condition information shown in the game, and distinguish higher general loot value from a specific weapon’s unknown drop chance.
Two confirmed Frozen Trail adjustments matter here. Embark increased Riven Tides’ overall loot value by about 15% and began testing Dynamic Loot Zones on Pendola Pass. Neither statement means that your next Weapon Case has a fixed chance to produce a Purple gun. If a Night Raid makes your exit less convenient, a shorter normal-condition case circuit can still be the smarter farm.
Map Conditions are a route and risk decision, not the source of a magic weapon multiplier. For hazards, timing and regional schedules, read Night Raids and Storms.
Common Rare-Weapon Farming Mistakes
- Following a route with a guaranteed number attached. Published community case locations are possible spawns; a room may be empty or already searched.
- Spending skill points for imaginary fixed locker drops. Security Breach gives access, not a guaranteed Epic gun.
- Mixing guns, blueprints and boss parts. The same weapon name may appear across crafting, quest and salvage systems, but the acquisition jobs are different.
- Crossing the whole map after a good find. A second rare case is less valuable if reaching it forces an avoidable extraction loss.
- Ignoring the current loot condition. Pendola Pass may move value between zones, and certain weapon-case positions depend on events.
- Assuming older weapon classifications are unchanged. For example, Anvil moved to Rare in Frozen Trail. Verify the current item classification instead of copying an old tier list.
- Putting every expensive gun into the same risky raid. If the goal is to grow a usable stash, a replaceable farming kit usually makes more sense than carrying two prized Legendaries.
Solo vs. Squad Weapon Farming
A solo Raider controls the route and exit decision but must cover every threat alone. Favor nearby rooms and a reliable fallback. A duo or trio can divide scouting and lookout duties, yet a bigger group can still lose everything by splitting across multiple buildings. Do not invent a fixed loot multiplier or assume all teammates receive identical drops.
Before entering, agree on the same practical rule: one good find can end the run. If a teammate finds a wanted recipe or your group recovers a high-tier weapon, check the remaining exit options together. For communication and regroup plans, use the Squad Coordination Guide.
ARC Raiders Rare Weapon Farming FAQ
What is the best map for farming Rare or Epic weapons?
There is no confirmed universal winner. Spaceport’s Arrival and Departure Buildings, Dam’s Research & Administration and Hydroponic areas, and Pendola Pass’ Railyard offer clusters of possible Weapon Case spots. Choose the cluster closest to your spawn and extraction rather than chasing an unsupported “weapons per hour” guarantee.
Where do I find Weapon Cases?
They appear at known possible locations on all seven maps, including buildings, industrial facilities, towers and rooftops. Not every possible spot is filled in each match. A map marked with potential spawns is a planning tool, not a promise that the case will be there.
Can a Security Locker contain an Epic weapon?
Yes, occasionally. You need the Security Breach skill to open it. The exact loot table and Epic drop percentage are not verified, and the lockers can appear on several maps, not just Spaceport.
Is Anvil a Rare or Uncommon weapon in Frozen Trail?
Anvil is Rare (Blue) following the October 8, 2026 update. Bantam took its former Uncommon hand-cannon role.
Does a weapon drop unlock the blueprint?
No. Owning a finished gun is not the same as learning its crafting recipe. Check whether that weapon’s blueprint comes from scavenging, a quest, Trials or the Research Station.
Does Night Raid improve Epic weapon drop chances by 30%?
No universal 30% increase has been established. Conditions may alter loot opportunities and difficulty, but do not assume a fixed Epic weapon rate from old farming spreadsheets.
Are Legendary weapons only obtained from Queen and Matriarch?
No. Queen and Matriarch Reactors support several famous Legendary crafts, but Dolabra uses other materials and its own blueprint. Check the exact recipe; a boss kill is not a universal Legendary gun drop.
Can I get a Legendary weapon by finding a reactor?
A reactor is a crafting material. It does not automatically grant a finished Aphelion, Equalizer or Jupiter. You still need the correct blueprint, components and station access.
What should I do if all the marked Weapon Cases are empty?
Check one nearby alternative or a Security Locker you can open. If the whole area is empty or contested, extract with what you have and switch clusters next raid rather than camping a fixed spawn point.
Should I farm a blueprint or use an ARC Raiders Loadout service?
If you want repeatable crafting, investigate the specific blueprint and station first. If you need a complete weapon kit now, compare the currently listed items in LepreStore’s ARC Raiders Loadouts. For DIY, a short case route is still the most direct way to search for a usable gun.
Final Weapon Farming Checklist
Pick the item you actually need, check a local cluster of possible Weapon Case positions, use Security Breach only when your build supports it, and decide on a real exit before adding another stop. On newer maps, adapt to changing loot value and the active condition instead of copying a fixed payout table. A clean extraction with one useful weapon is better progress than a long route built on an invented percentage.
For related next steps, use the Weapon Tier List for choosing guns, the Blueprint Guide for recipes, and the Safe Exits Guide for getting the loot home.
To browse other currently listed options beyond loadouts, recipes and materials, visit the ARC Raiders services catalog.
Last reviewed: October 25, 2026 (Frozen Trail 2.2). Item availability, container placement and map conditions can change.